🌐 Attack Surface Management
Overview
StrikeOne's Attack Surface Management (ASM) is a comprehensive solution that provides real-time visibility into an organization's cyber risk exposure. ASM disrupts traditional manual execution of expensive and complex offensive security services by offering an automated platform accessible to the entire industry.
ASM | AI Powered
Attack Surface Management (ASM) refers to the process of identifying, classifying, and monitoring all vulnerable access points in a network or system that an attacker could exploit.
It is a comprehensive solution that provides real-time visibility of an organization's cyber risk exposure. The solution is complete and designed to cover all necessary aspects for effective attack surface management. It provides immediate and up-to-date information on how exposed an organization is to potential cyber attacks, thus allowing the organization to understand and react quickly to these threats.
ASM disrupts the traditional manual execution of costly and complex offensive security services. Traditionally, offensive security assessments, such as penetration testing and security audits, are manual, labor-intensive, and costly processes carried out by security experts. ASM changes this approach by significantly reducing or eliminating the need for these manual tasks.
By offering an automated platform accessible to the entire industry. Instead of relying on manual processes, ASM utilizes an automated platform that can be used by any organization, regardless of size or sector. This democratizes access to advanced attack surface management tools, making them available to a broader audience, not just large corporations with substantial security budgets.
First Steps
- Have a registered StrikeOne account.
- You must have tokens associated with your account.
- Create a project.
- Scan
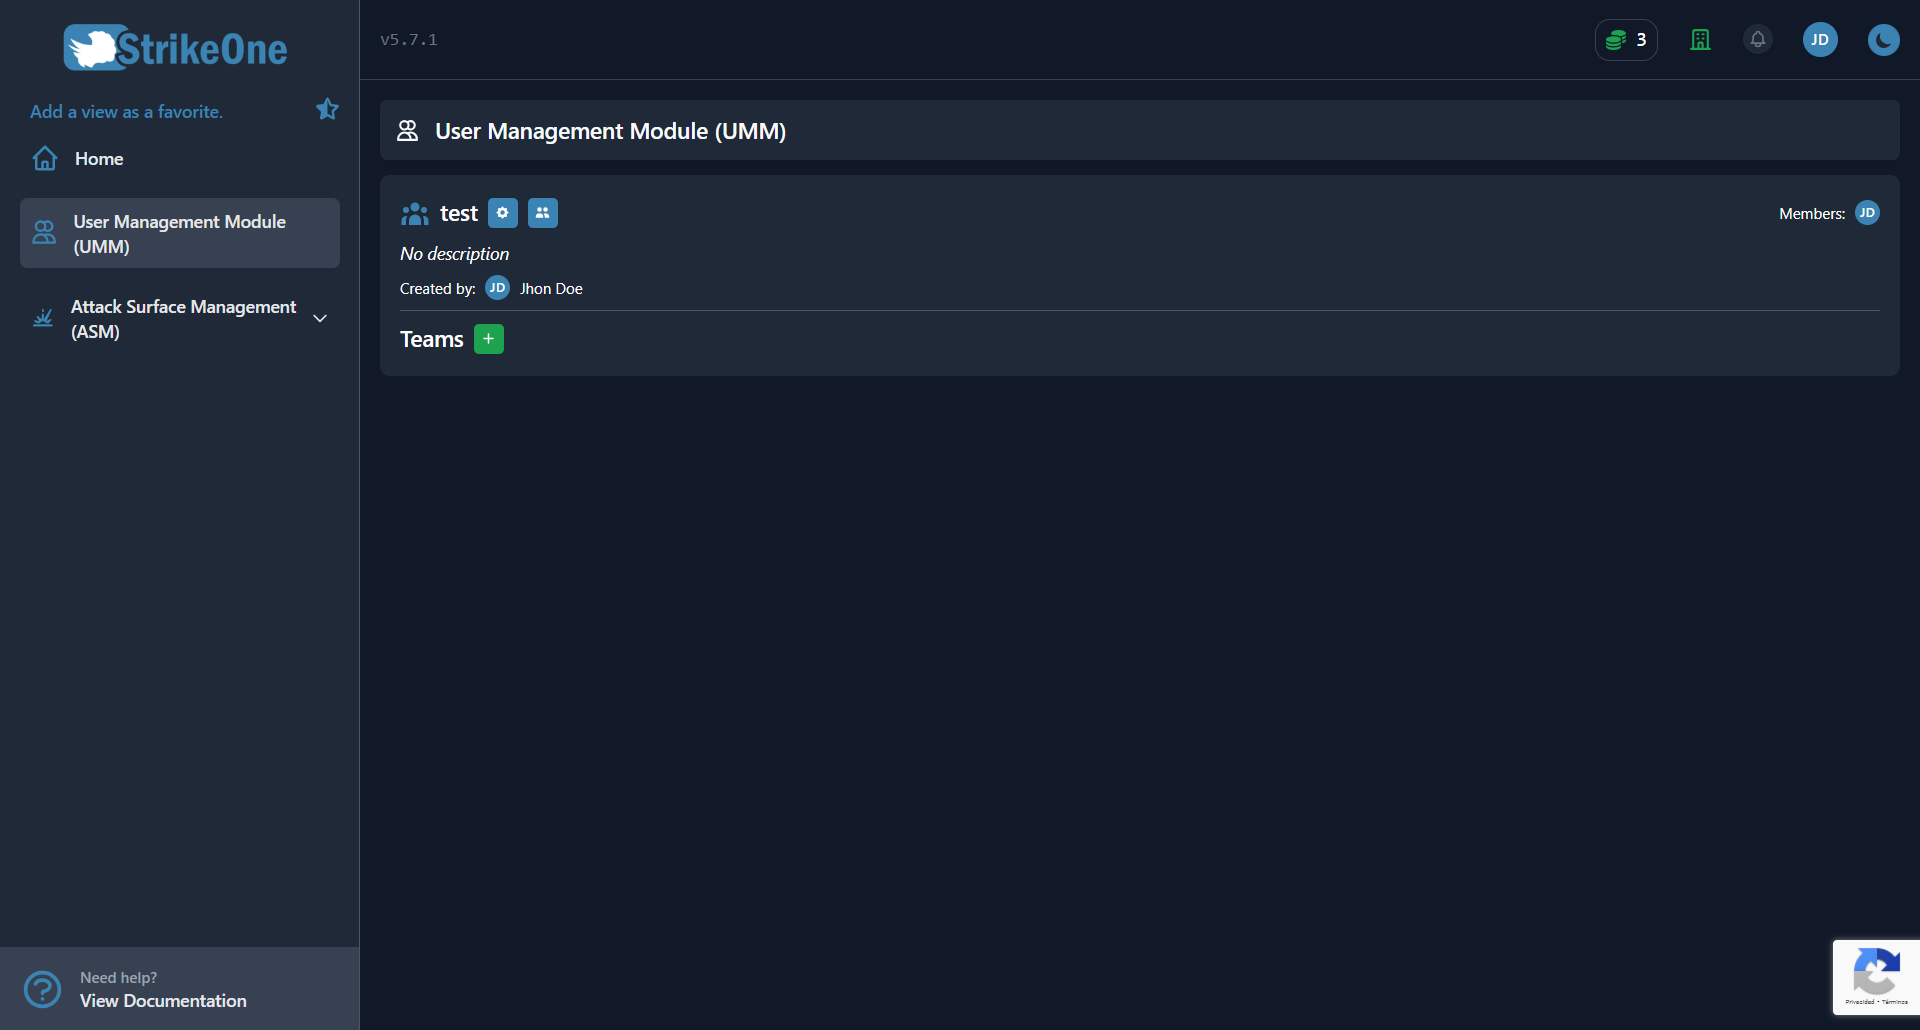
Organization
- Benefits of having an organization:
- The benefits of establishing an organization lie in the ability to create teams, which allows for sharing tokens, projects, assigning specific permissions, and efficiently inviting members.
- If you wish to obtain information on how to create and configure your organization, we invite you to consult the corresponding section in User Management Module (UMM)
Tokens
- Each token is equivalent to one scan.
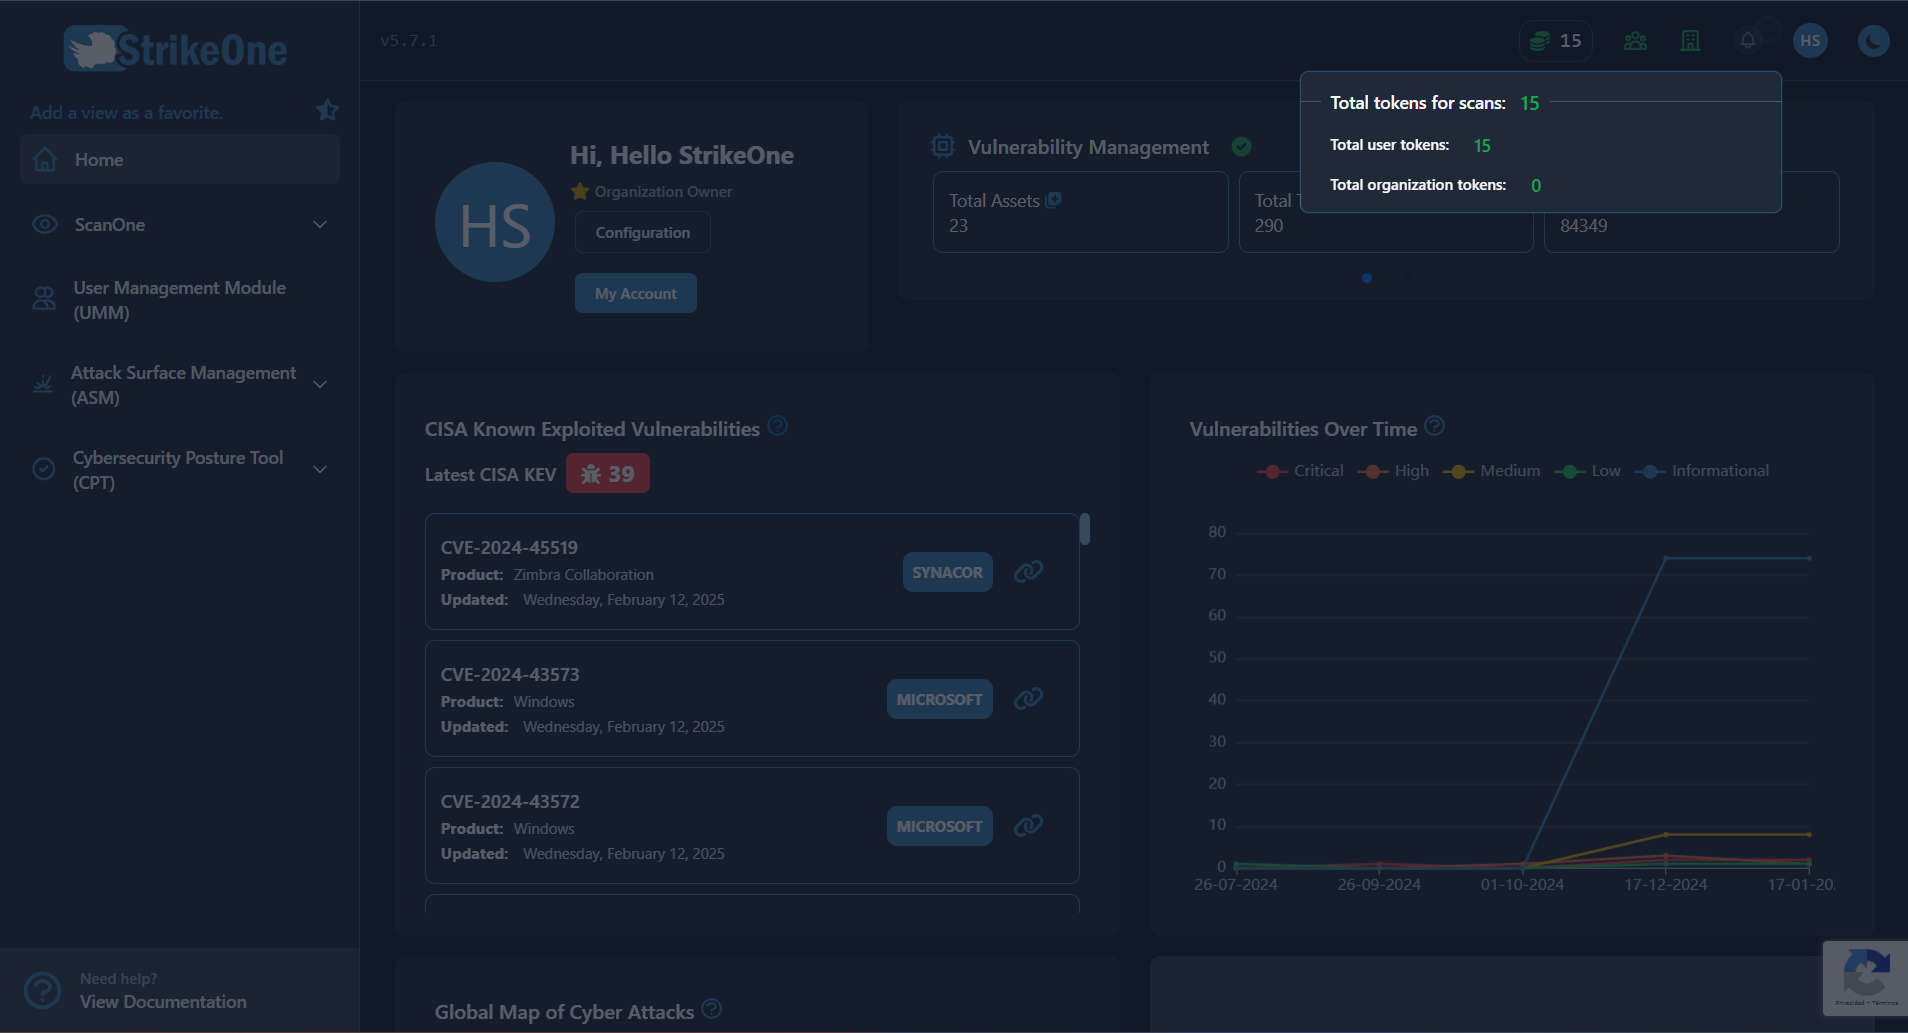
- There are two types of tokens: one at the organizational level and another at the user level. User-level tokens can be used as long as the user has the necessary permissions for their use in scans. Additionally, it is possible for a user to have the required permissions but not have the shared projects, which would allow them to use their respective user-level tokens. In the case where the project is shared, the organizational-level token will be used.
Note: To perform a scan using organization tokens, the user must be on a team.
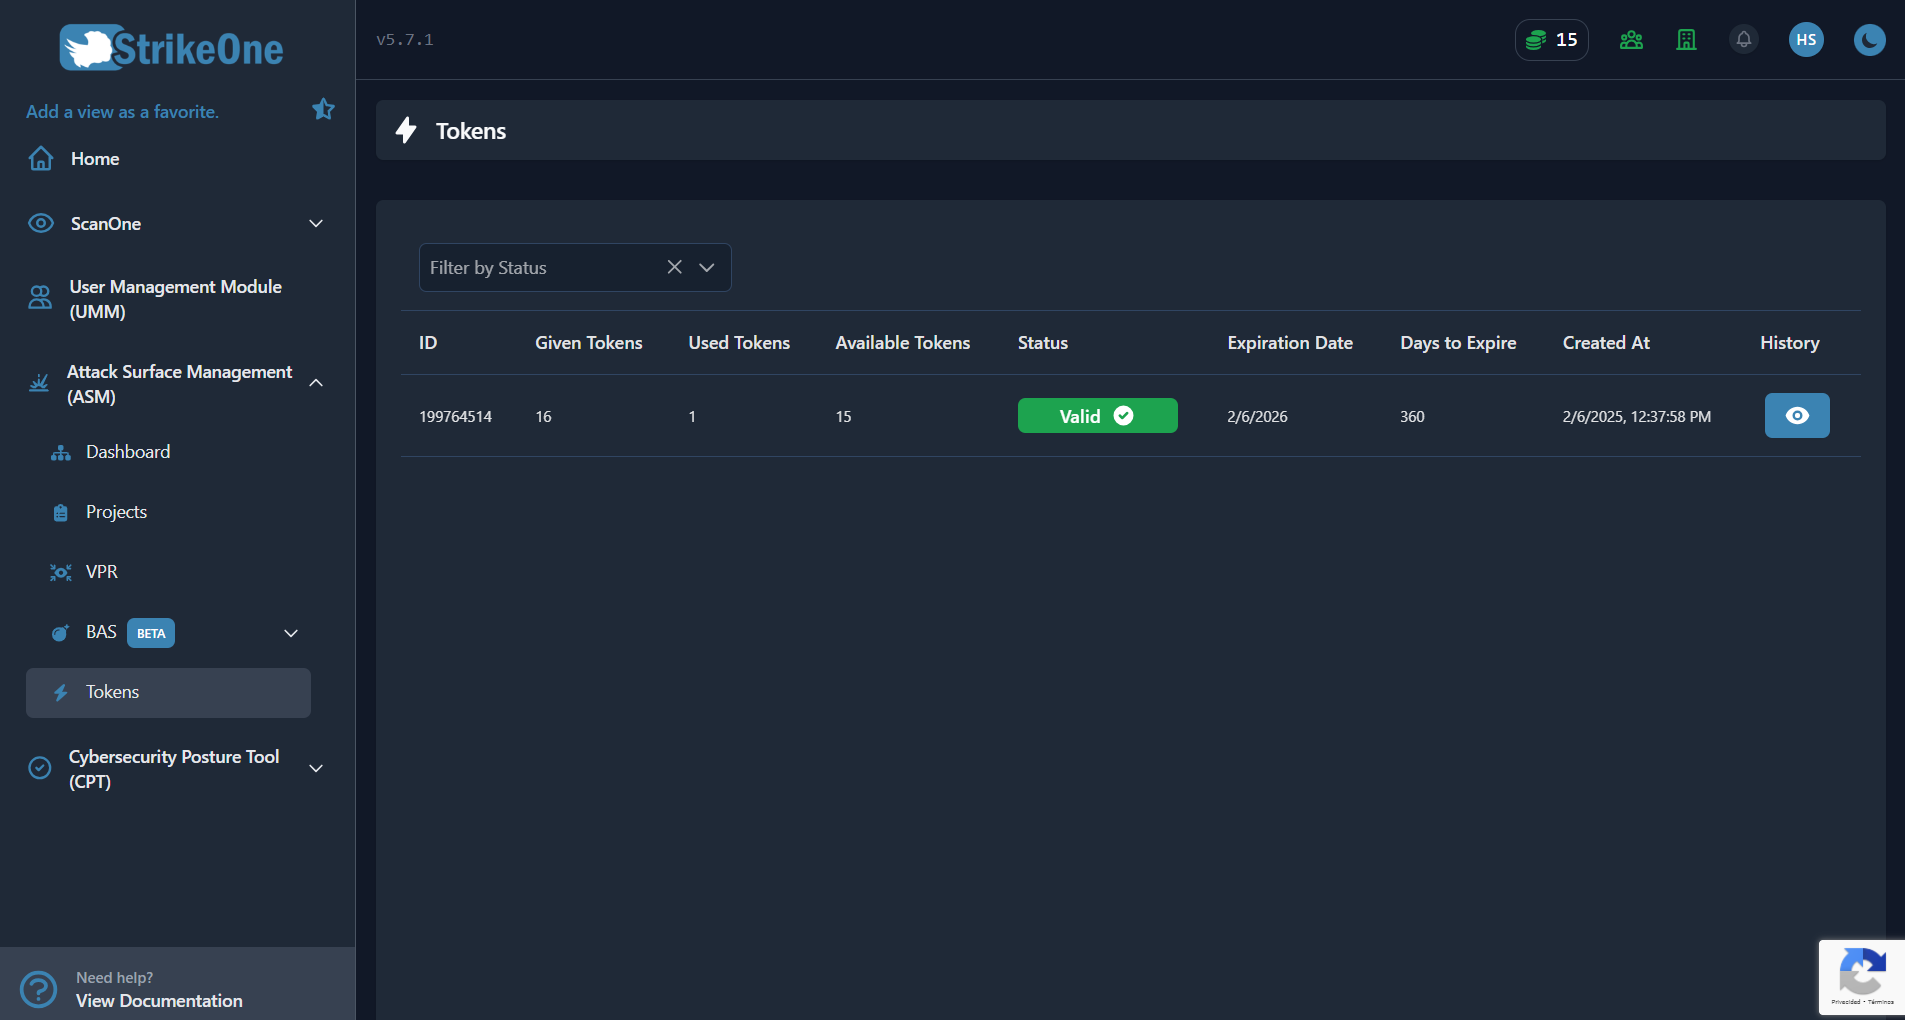
- In the token view, you can see information regarding the granted, used, and available tokens at that moment, as well as the status of each token and the ability to filter the search by the desired status.
Note: Once the token has expired, it can no longer be used.
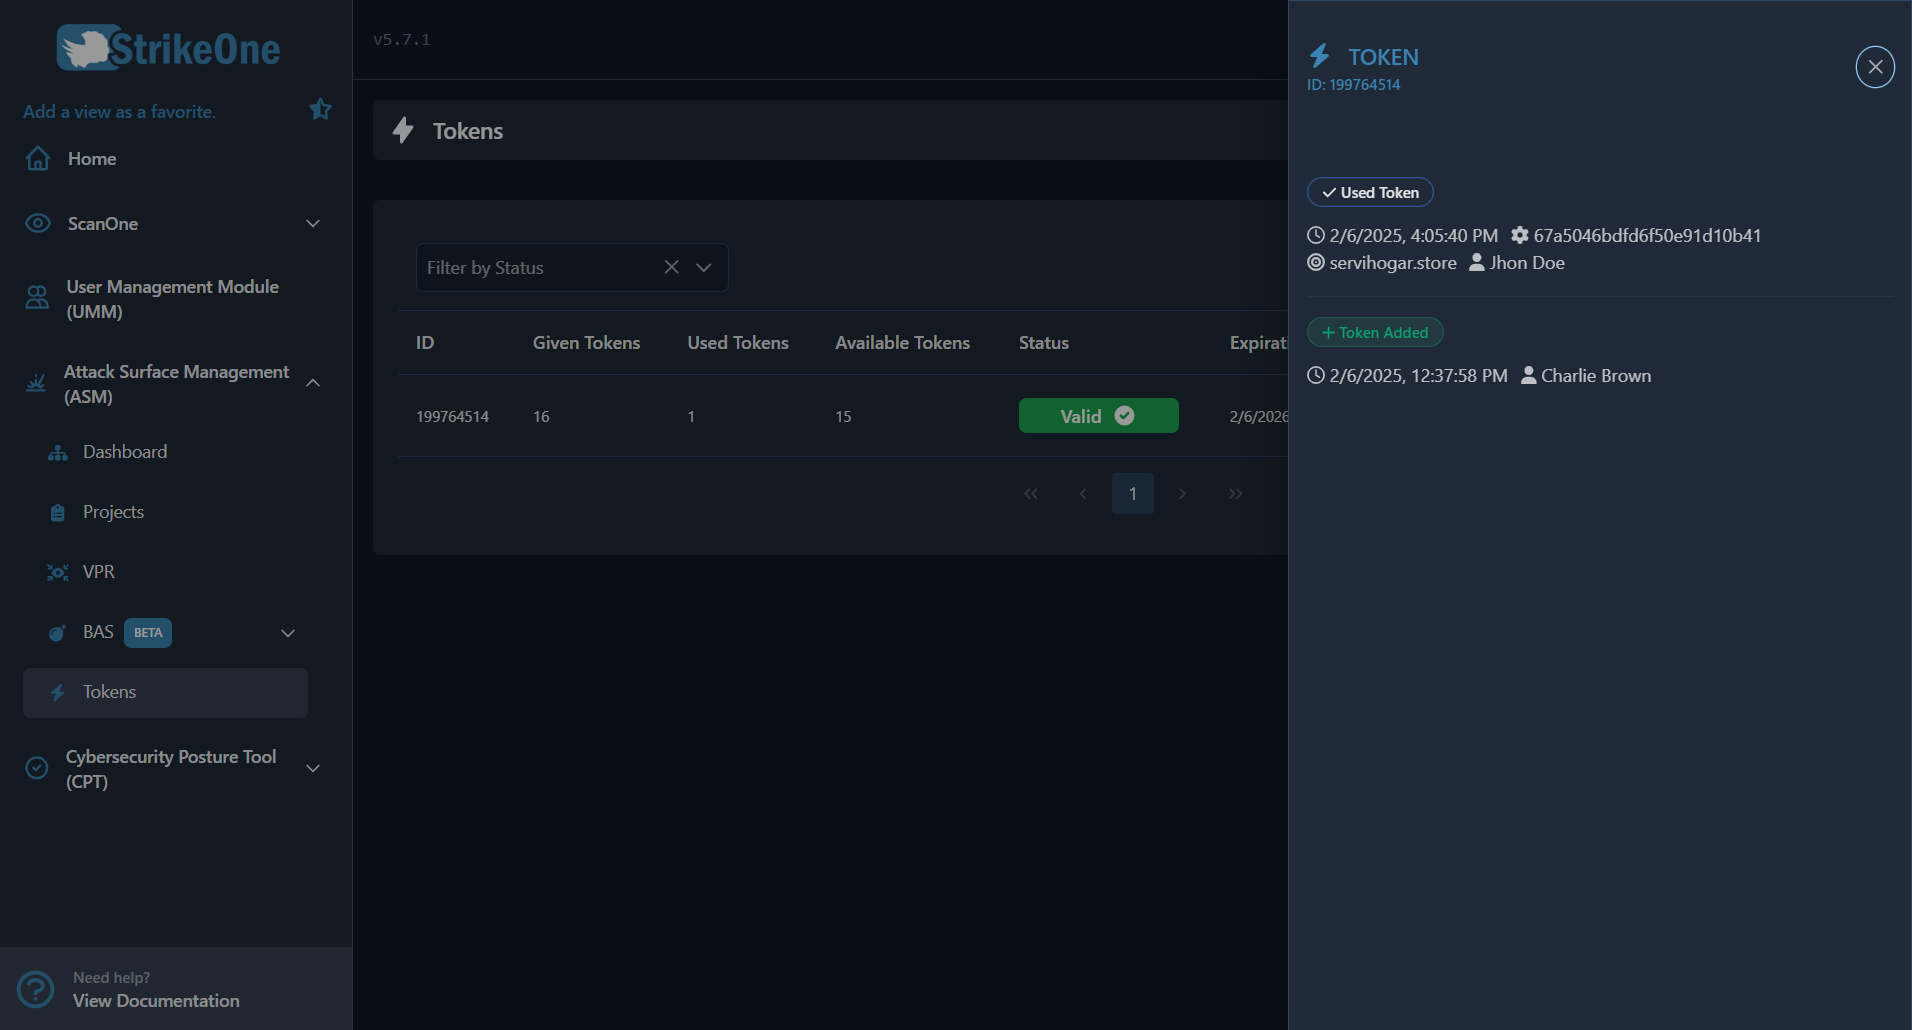
- You will be able to access the detailed history, which includes information about the user who used the token, the domain where it was used, the date it was employed, and the corresponding scan identifier.
Note: When the scan is performed, the token is allocated until the scan is complete. If it fails at any stage or lacks the necessary information to proceed, the token will be returned.
Shared Project Configuration
- In order to share projects with team members, the following configuration must be made at the organizational level, which can be found in User Management Module (UMM).

- The initial configuration to enable Share projects among members is mandatory.
Creating a project
- Insert project name.
- Insert domain. Example: google.com
- Select type of Company (small, medium or big).
- Insert description of project.
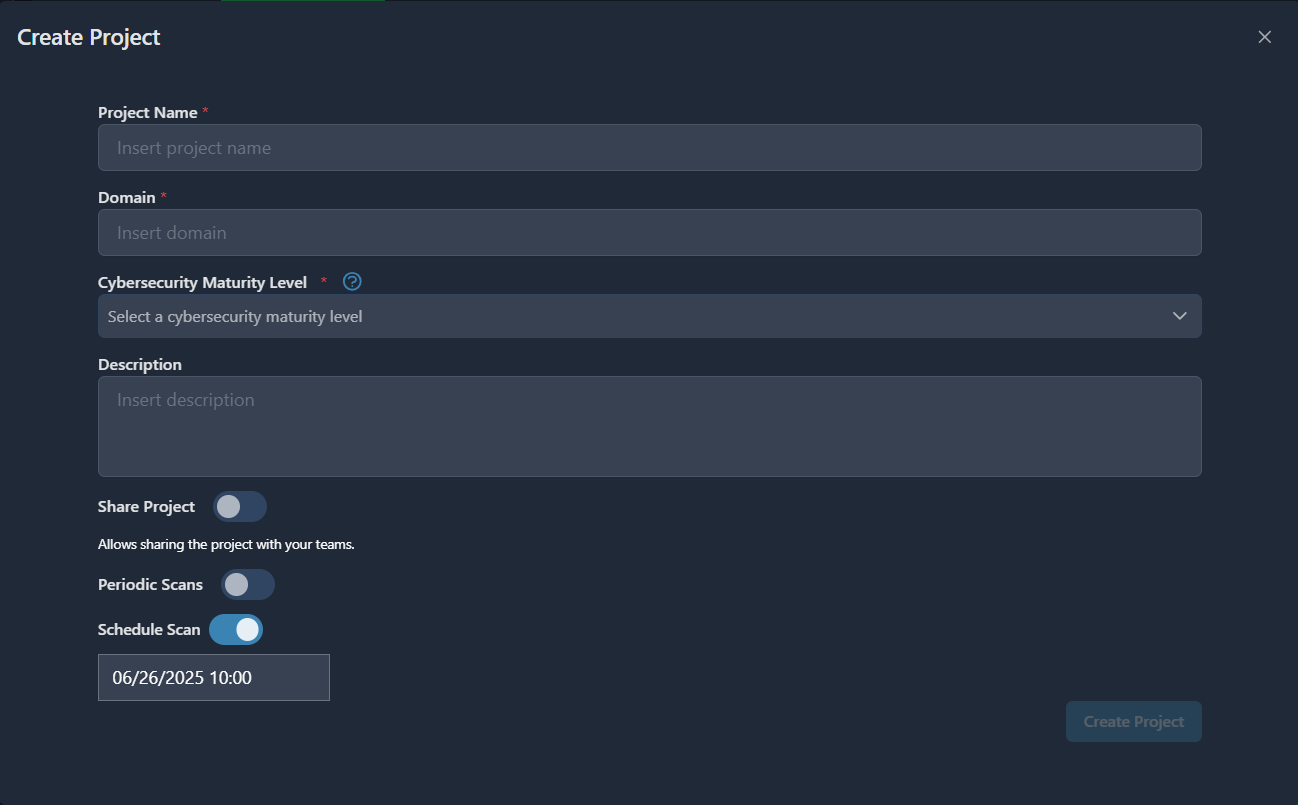
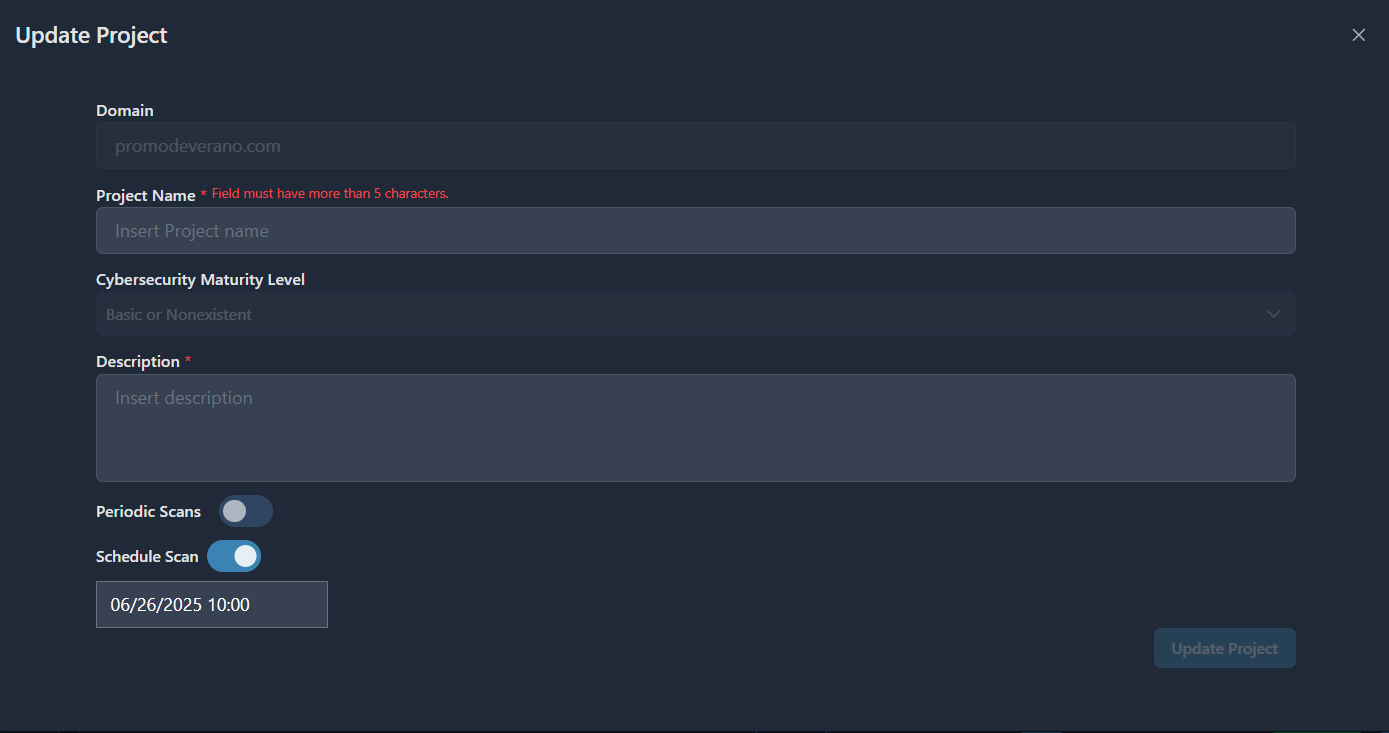
- Periodic Scans:
- You can setup scans (daily, weekly and monthly).
- Select the time to start the scan.
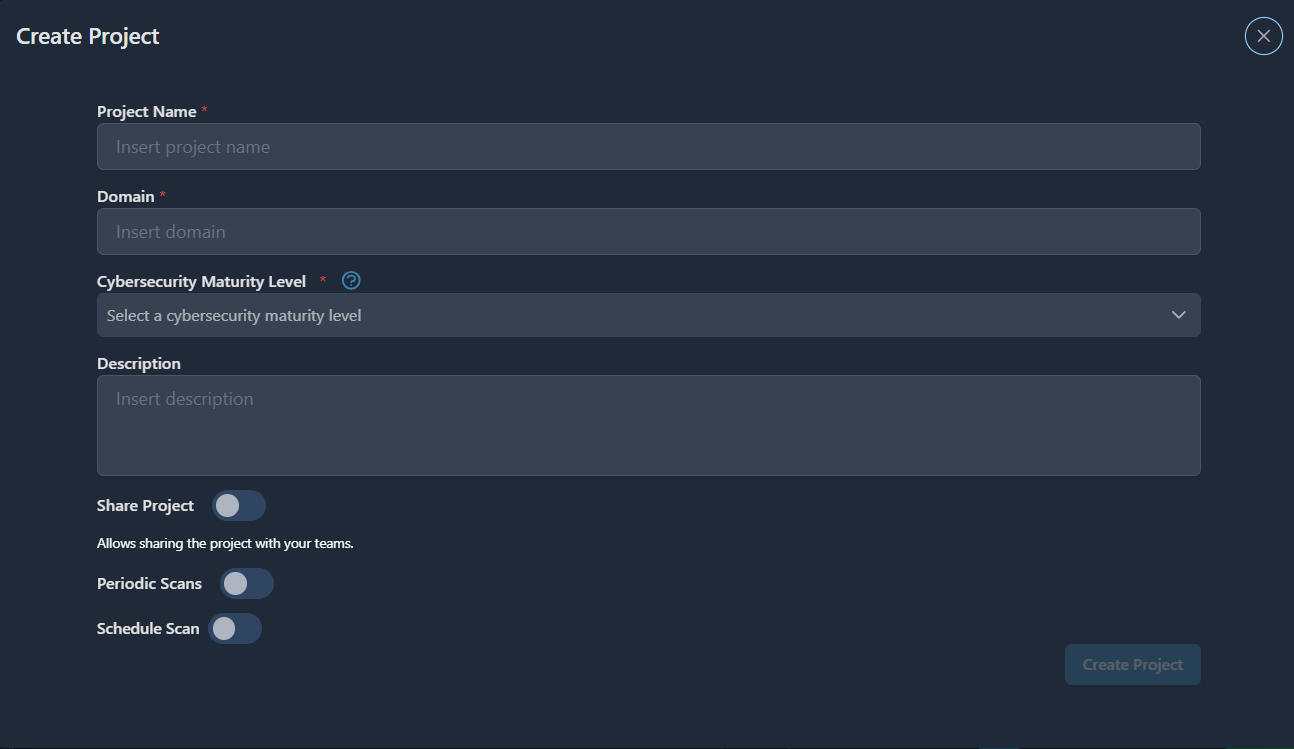
- Share project:
- This option will be available as long as the configuration is set at the organizational level.
- Additionally, it can be assigned to one of your teams created within the organization.

- Schedule scan date:
- In this option, you can select the date to schedule the scan.
Project List
List of projects associated with the account.
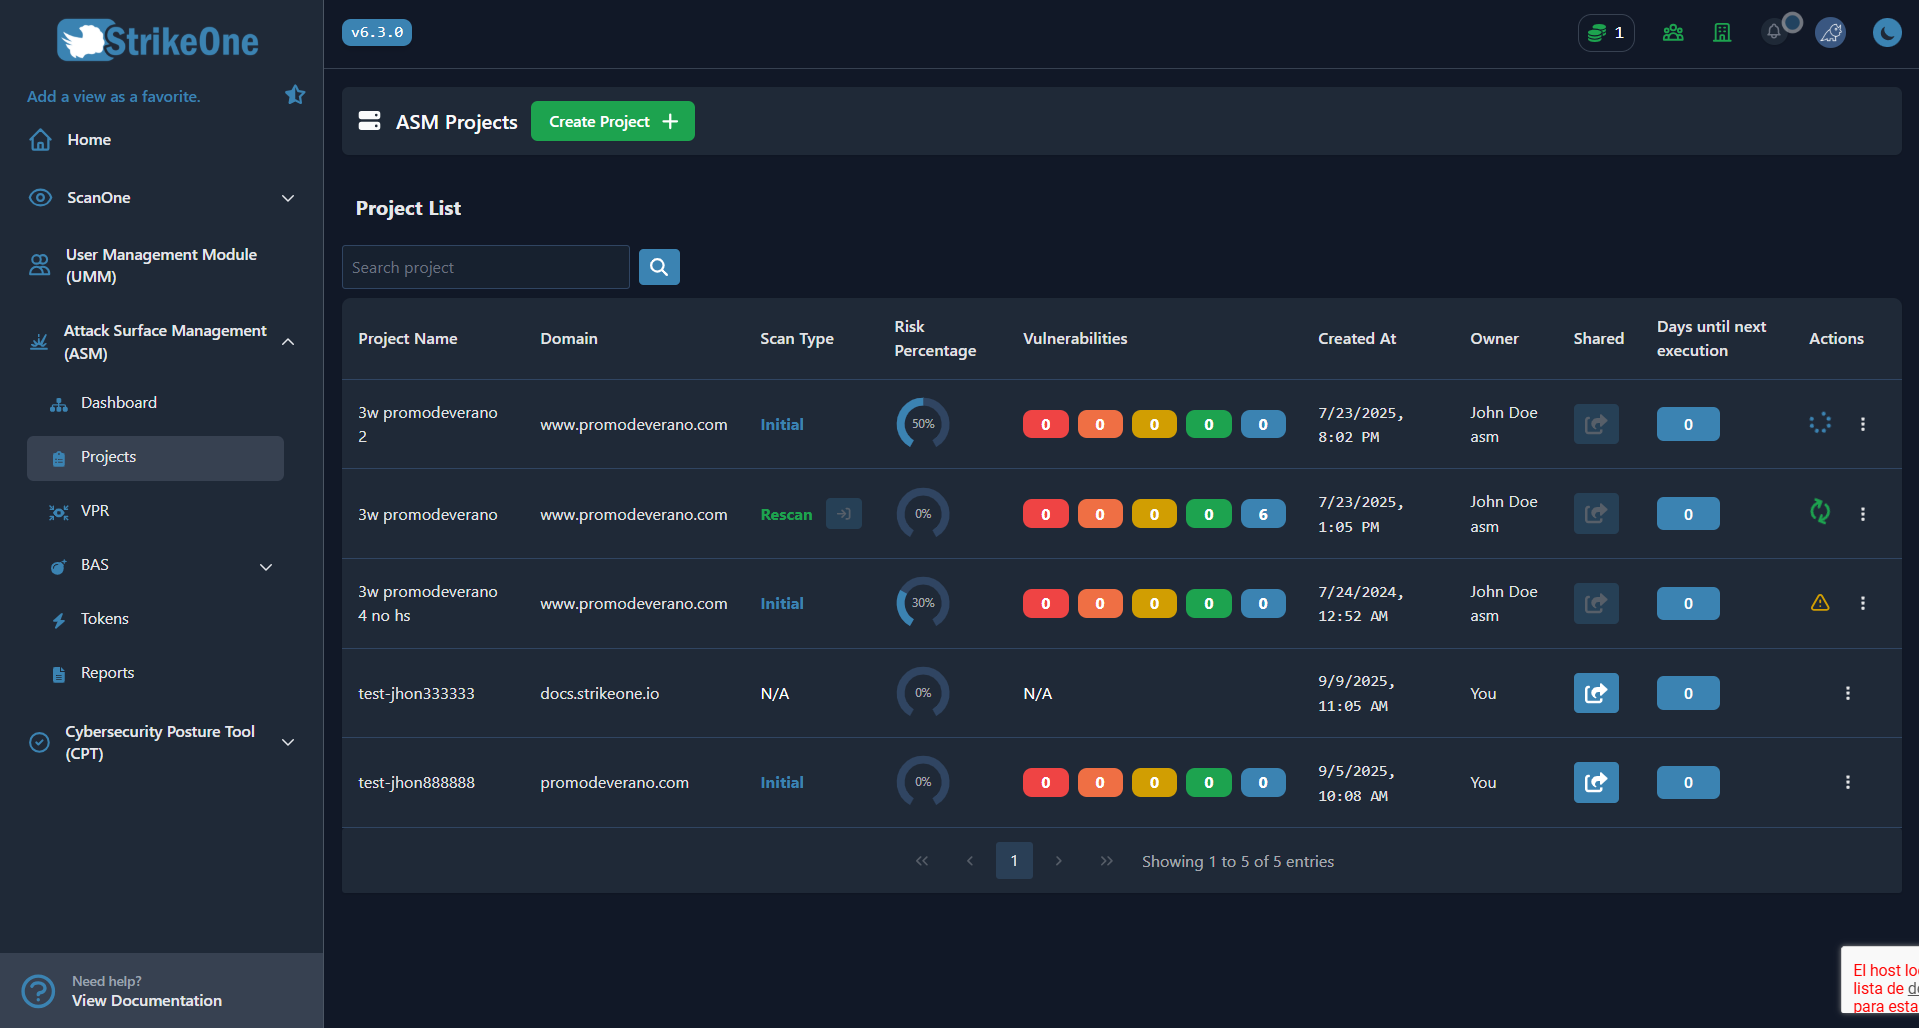
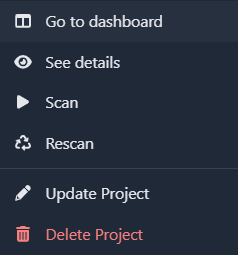
- From the projects tab, and with the corresponding permissions, you will be able to perform scans, as well as view and search for information. This will include details for each project, such as its domain, owner, scan type, risk percentage, vulnerabilities, and creation date. In the vulnerabilities column, you can click on a count to access the vulnerability view. Additionally, an indicator will show the time remaining until the next scheduled scan. Each project will have an actions button that unifies access to the details tab, the scan option, a link to the dashboard, and the functions to update or delete the project. Within this menu, the 'Rescan' button will only be enabled if the previous scan was performed less than a year ago; otherwise, an alert will be displayed indicating that the action is not possible.
- Similarly, projects that are shared will use tokens at the organizational level. To stop sharing a project, you must use the corresponding button in the table and select the team with which you want to stop sharing it. On the other hand, projects that are not shared will use tokens at the user level.

Note: The owner and share project columns will be available if the organization is configured to share projects.
- Update project:
- In the project update tab, you can modify both the name and the description, specify whether you want it to be a periodic scan, and schedule the next scan date if it hasn't been set previously.
"See more":
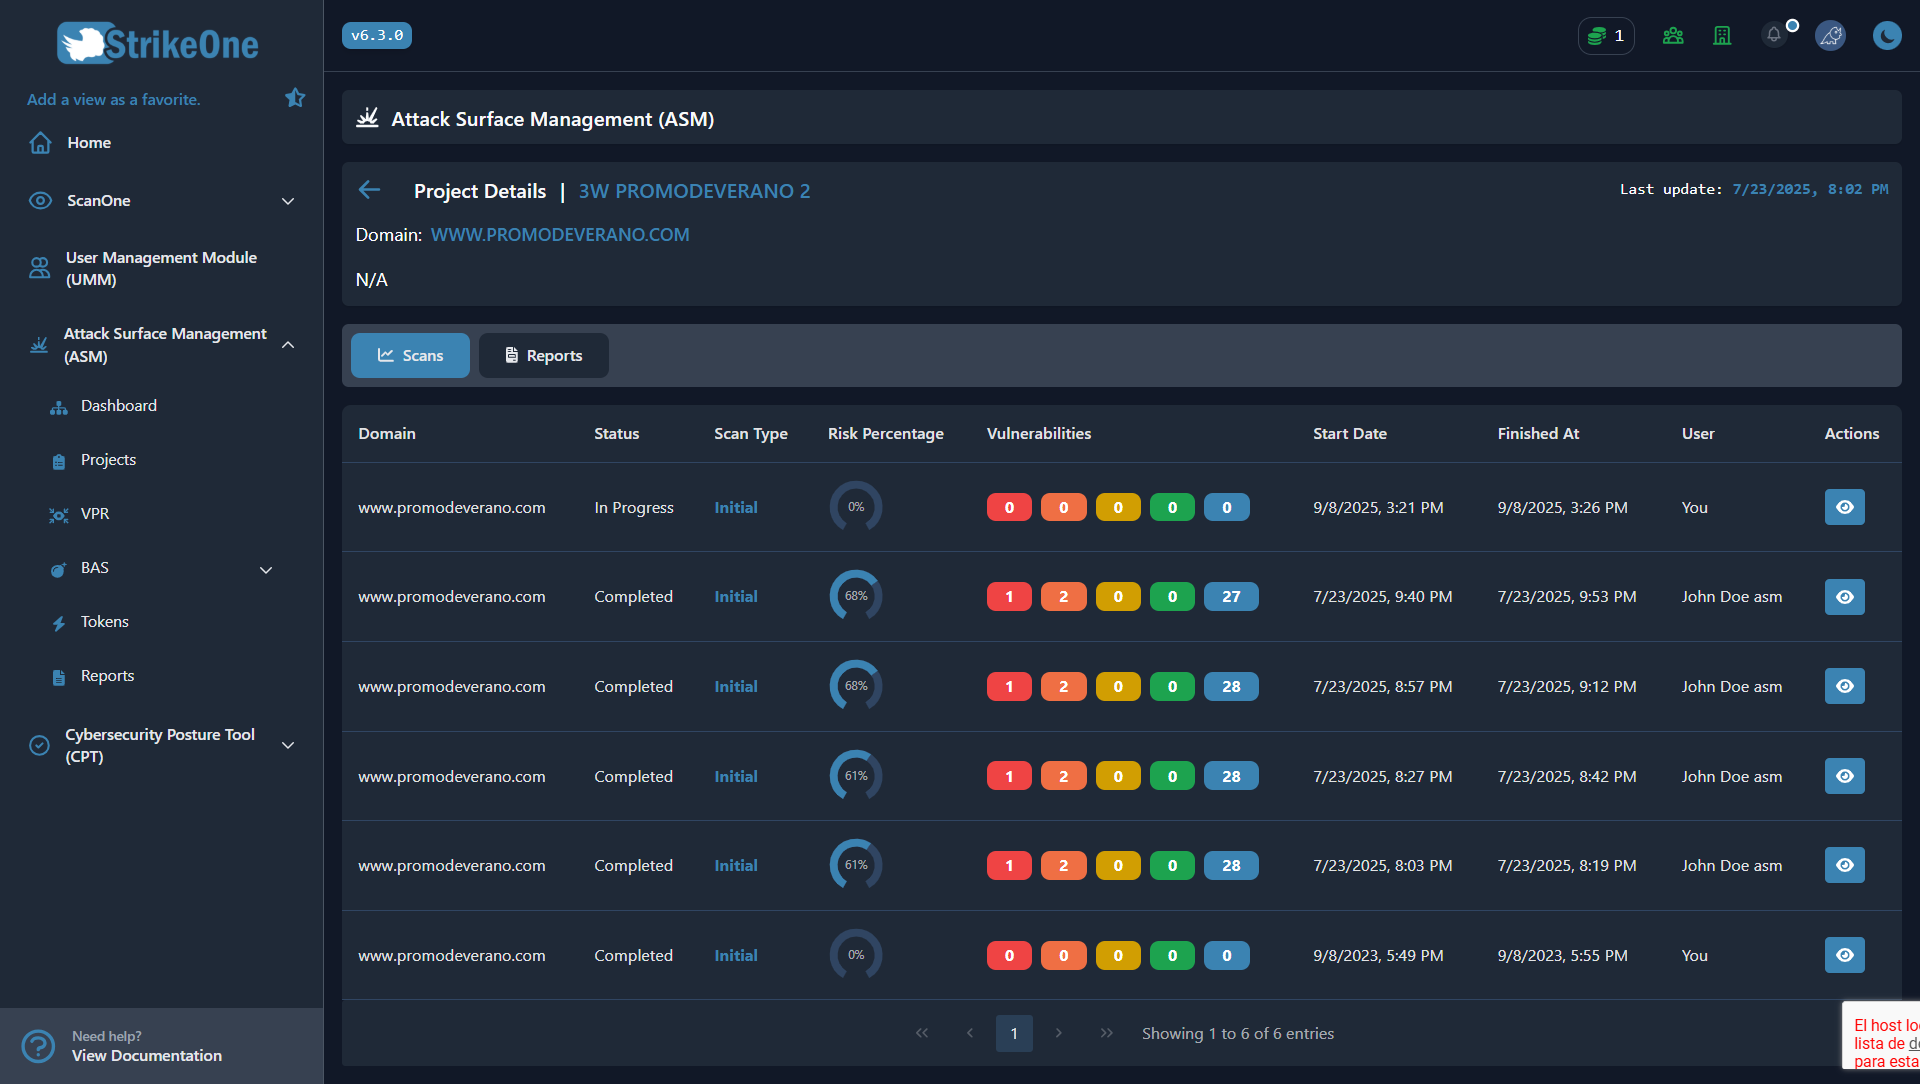
Scans Tab
- List of scans associated with the project
- Actions:
- You will be able to see the scanning steps
- You will be able to access the rescan tab through the button that appears next to the scan type when it is a rescan type.
- You will be able to view the type of scan performed, the associated risk percentage, and the detected vulnerabilities.
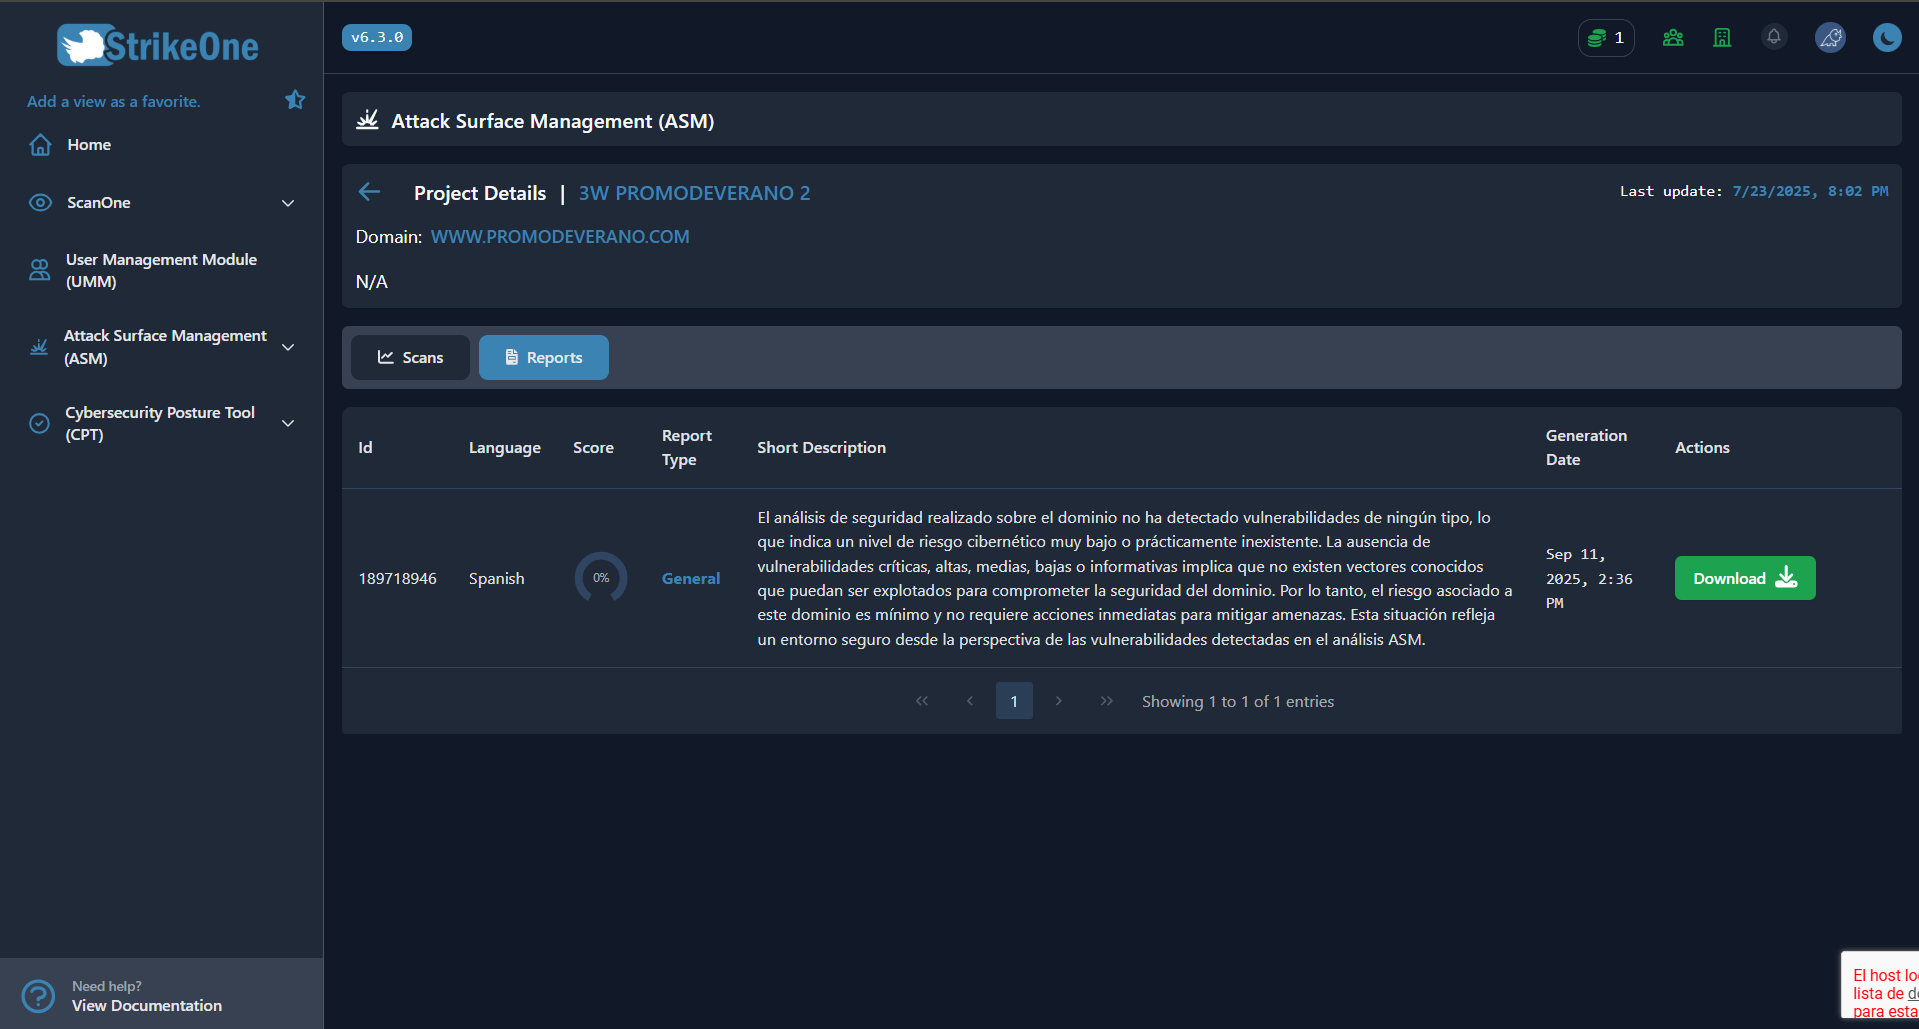
Reports Tab:
You will be able to see and download the previously generated reports
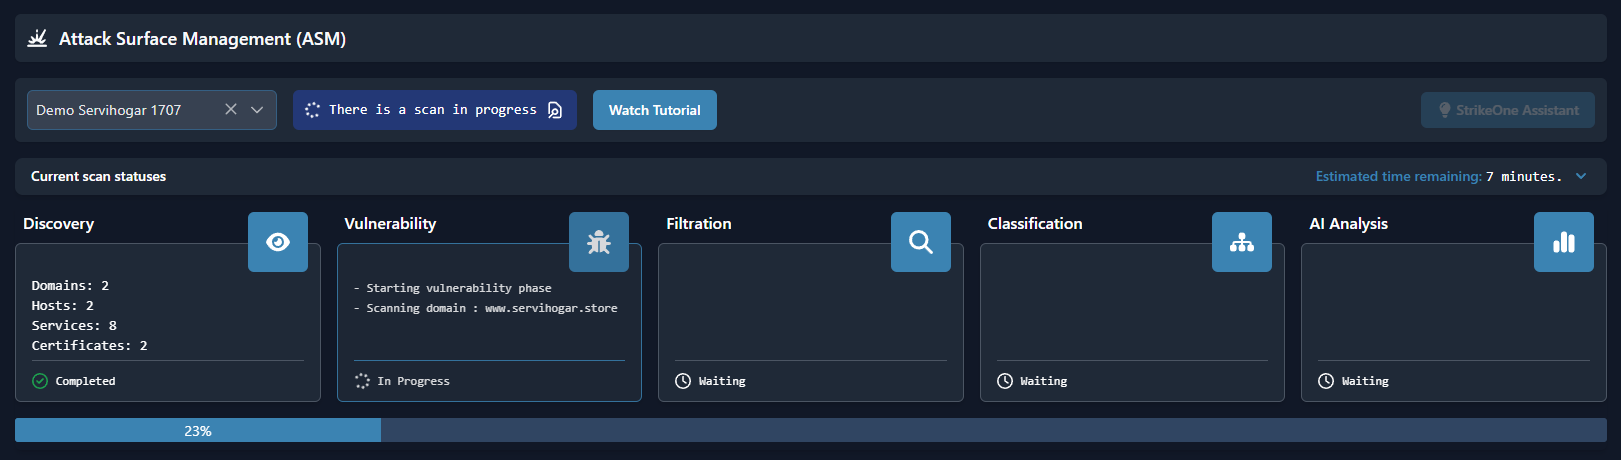
Scan
The scan consists of multiple phases:
- Discovery: Automatic identification and collection of information about an organization's assets, such as servers, applications, network devices, etc., that are exposed on the Internet.
- Vulnerabilities: Analysis of vulnerabilities of assets previously identified in the discovery phase.
- Filtrations: Stage where different sources are monitored (Deep, Dark, Clear Web). This includes searches in filtered databases, forums, communication groups, among other sources of information.
- Classification: Stage where the findings are analyzed and classified according to their type. The system uses criteria to define and categorize Vulnerabilities and Leaks, which facilitates prioritization and decision making.
- AI Analysis: stage where Artificial Intelligence is applied to deliver results, recommendations, best practices, among others.
Dashboard
You can see the general statistics of each project.
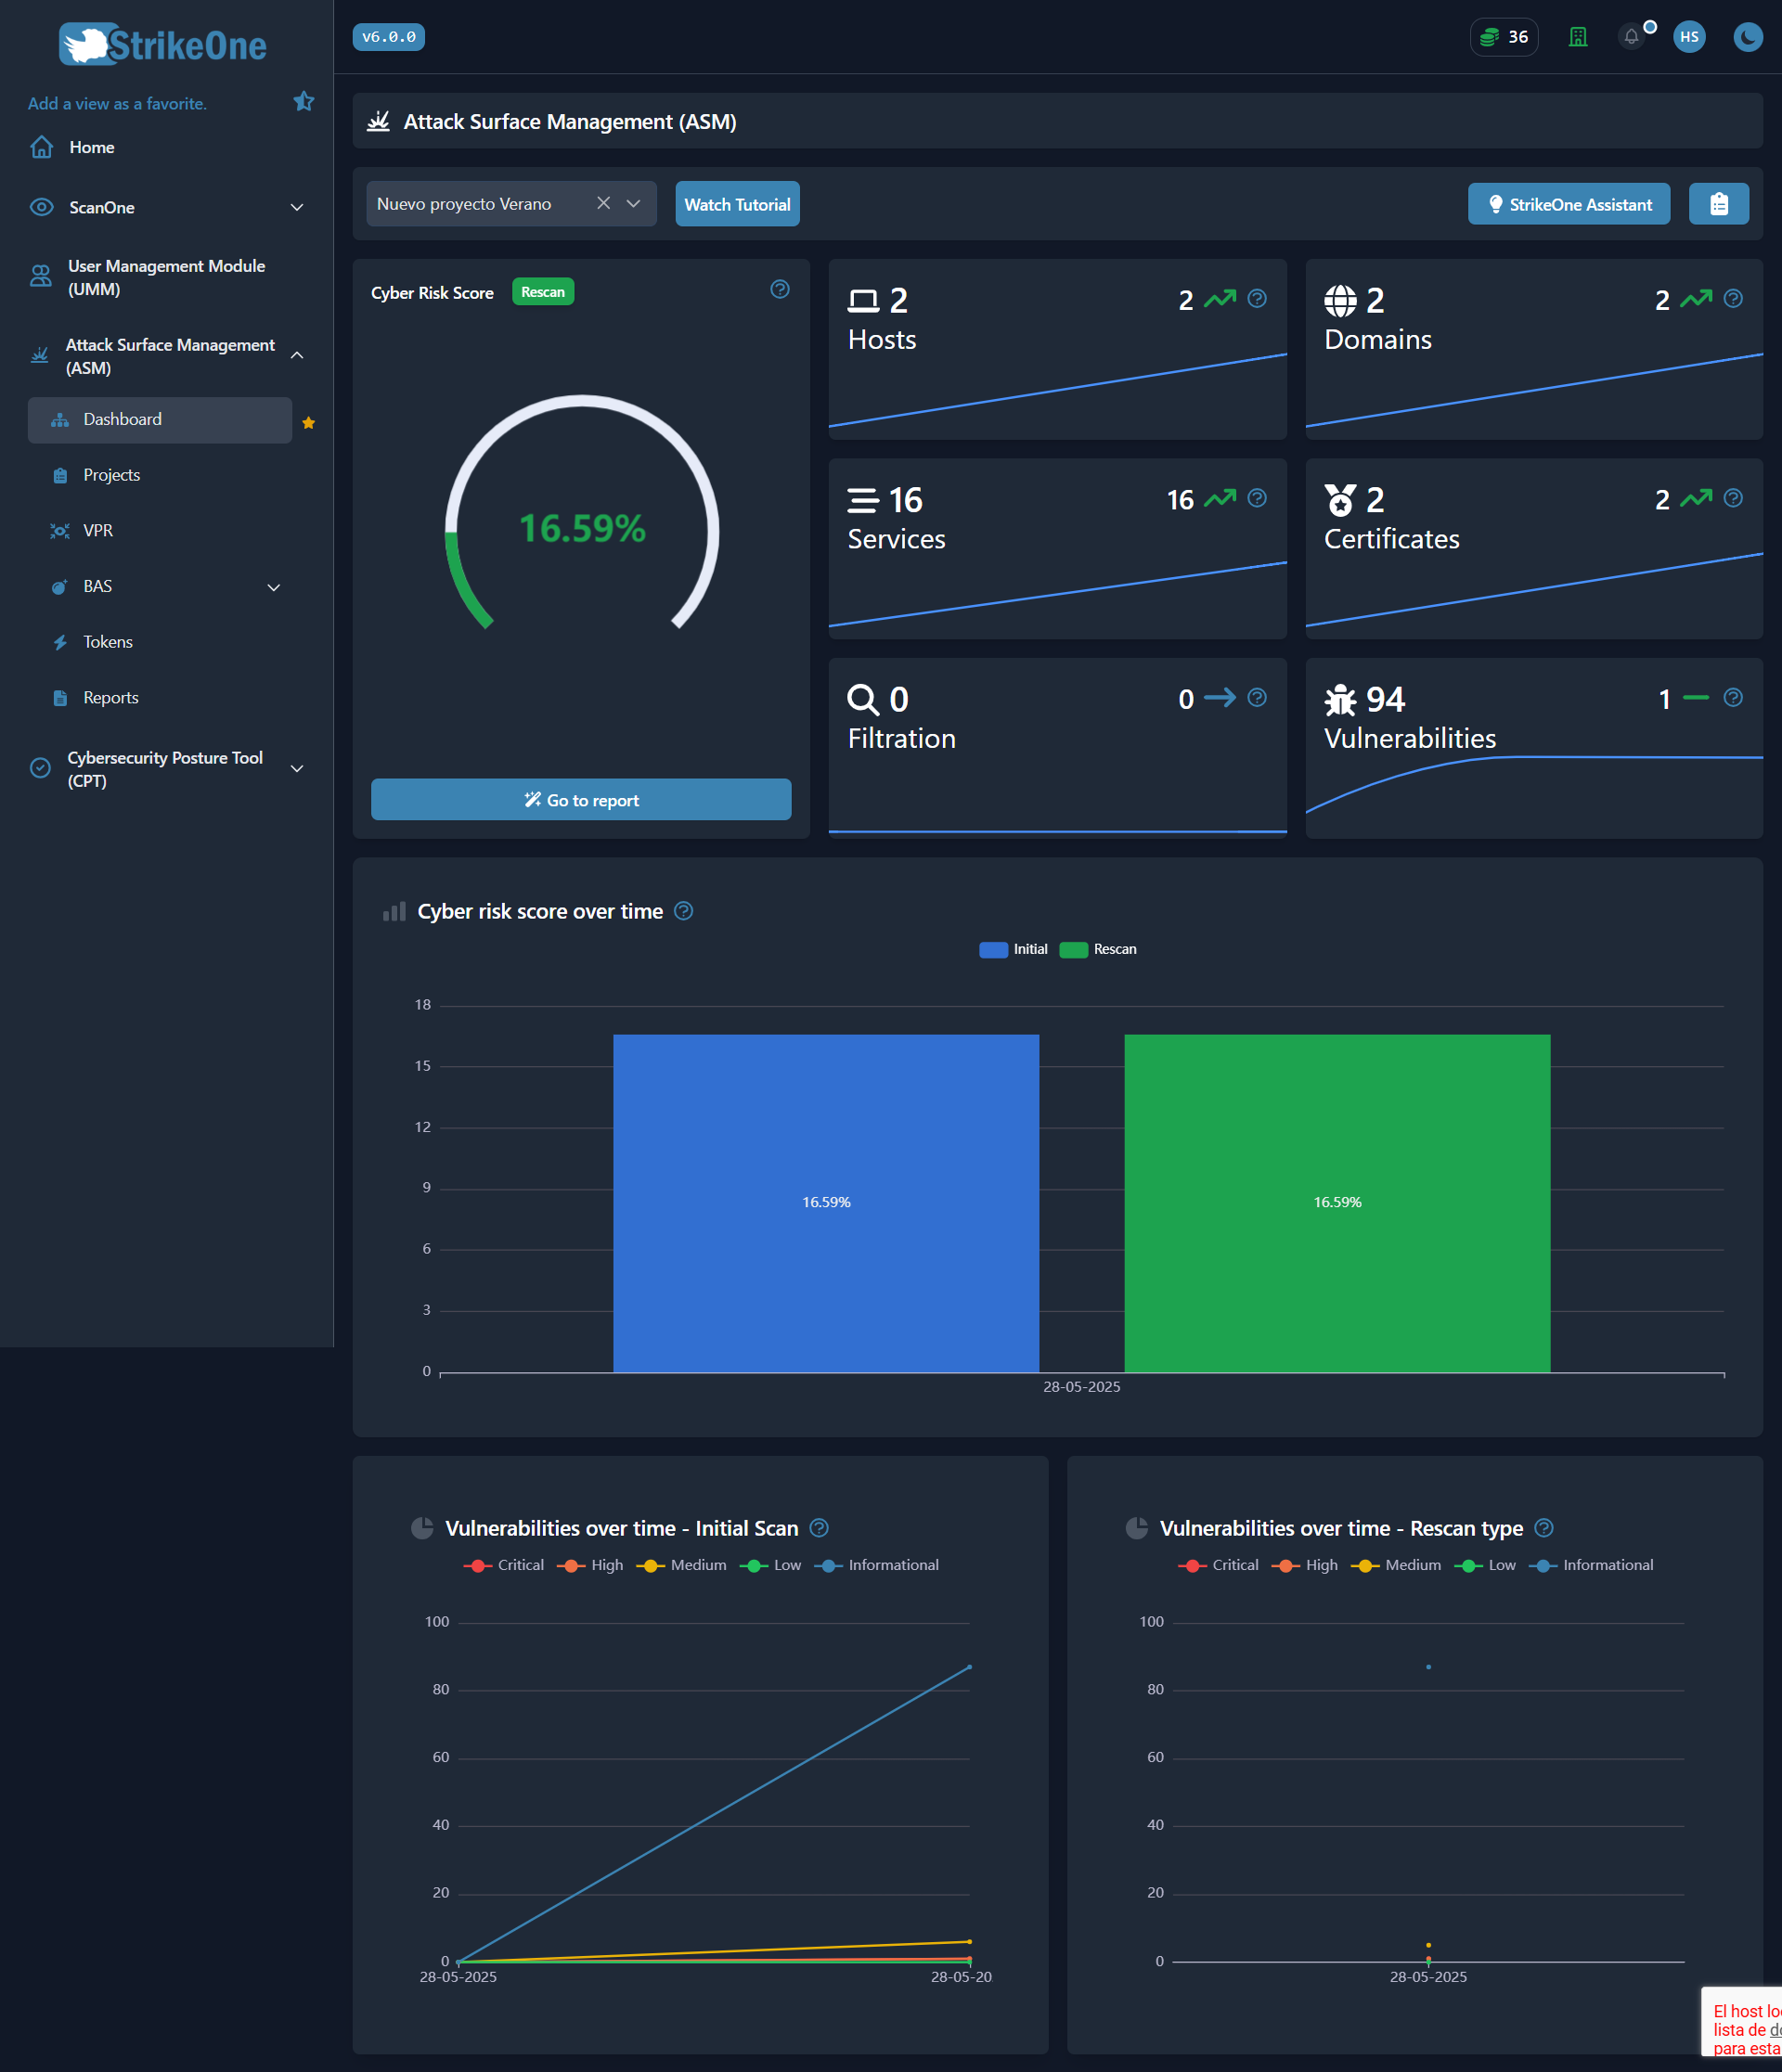
Cyber Risk Score: This percentage represents the level of exposure and vulnerability of the detected attack surface. A higher value indicates greater risk, based on the number and severity of vulnerabilities found, as well as the criticality of the affected assets and evidence of a data breach (Dark and Deep Web).
Additionally, if the scan is a re-scan, you will be able to access that view using the button displayed above the chart. You can also access the reports tab using the button located below the same chart.
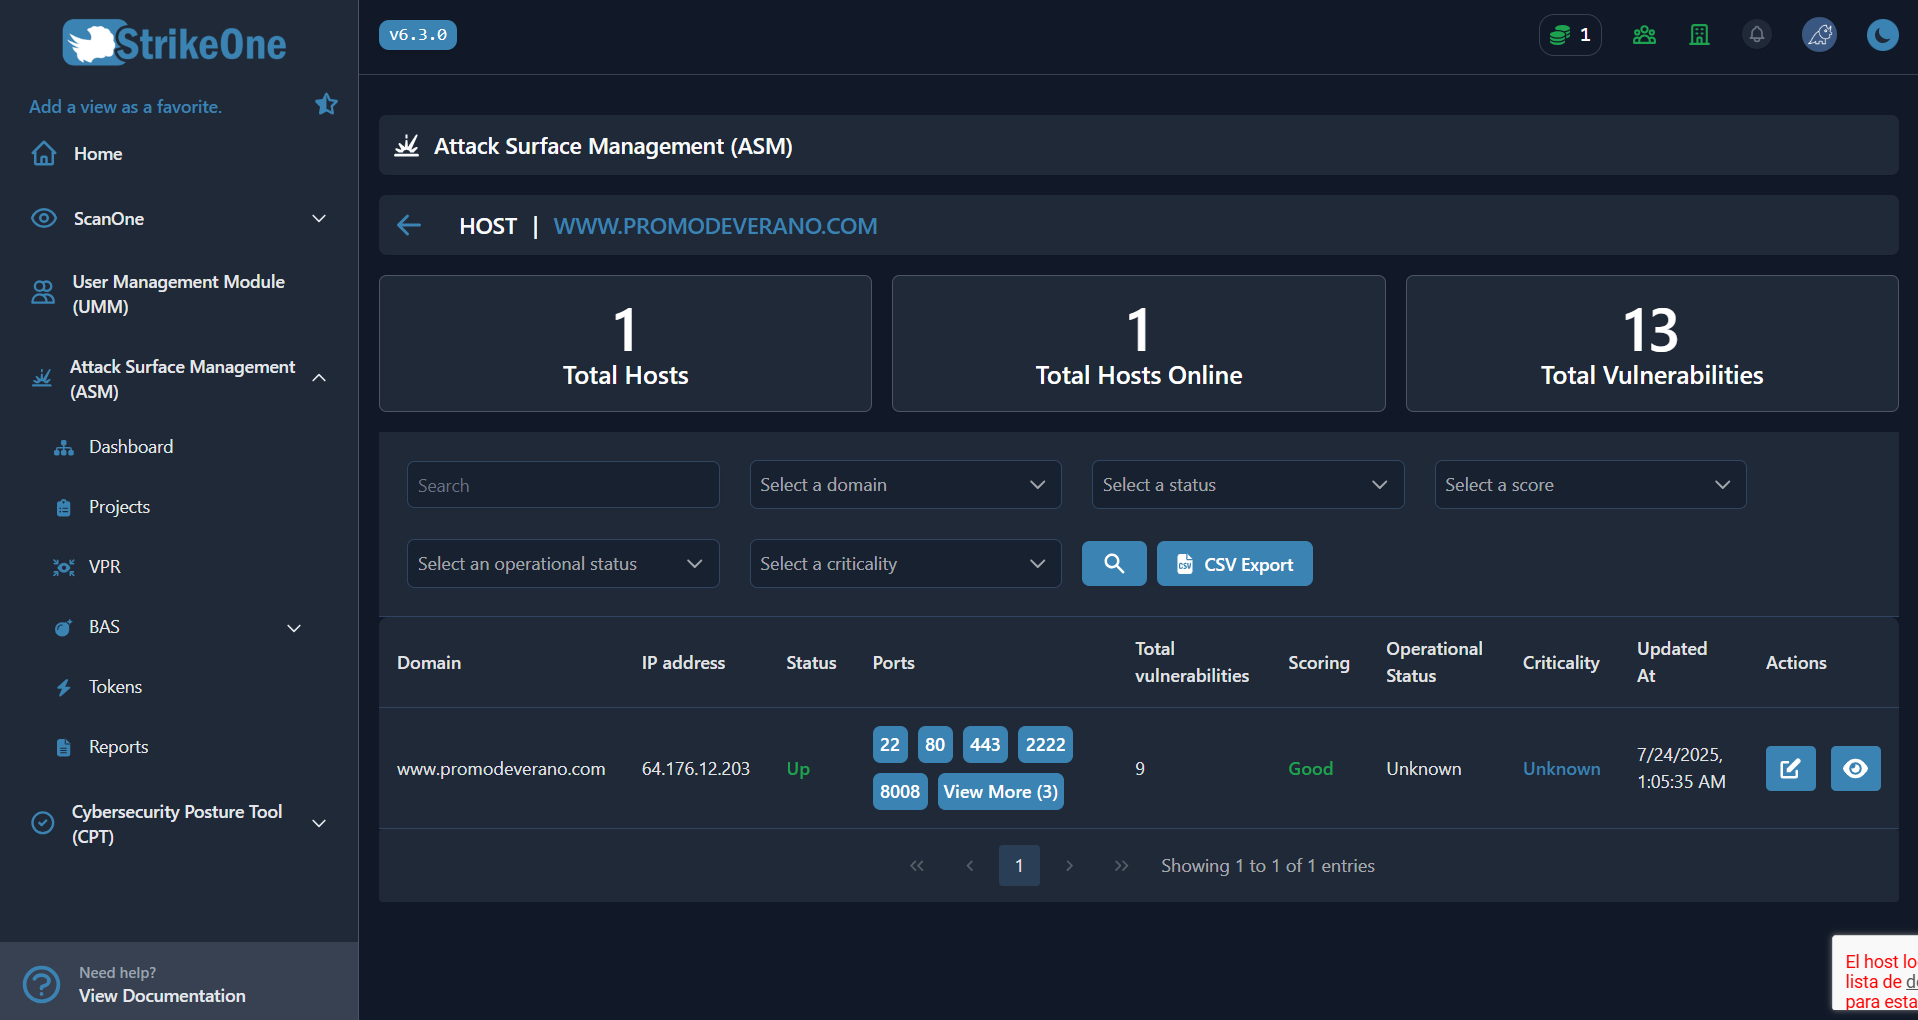
Hosts: A host refers to any device that can be reached over a network, such as servers, computers, mobile devices, etc. In the context of attack surface management, hosts represent points of potential entry for external or internal threats.
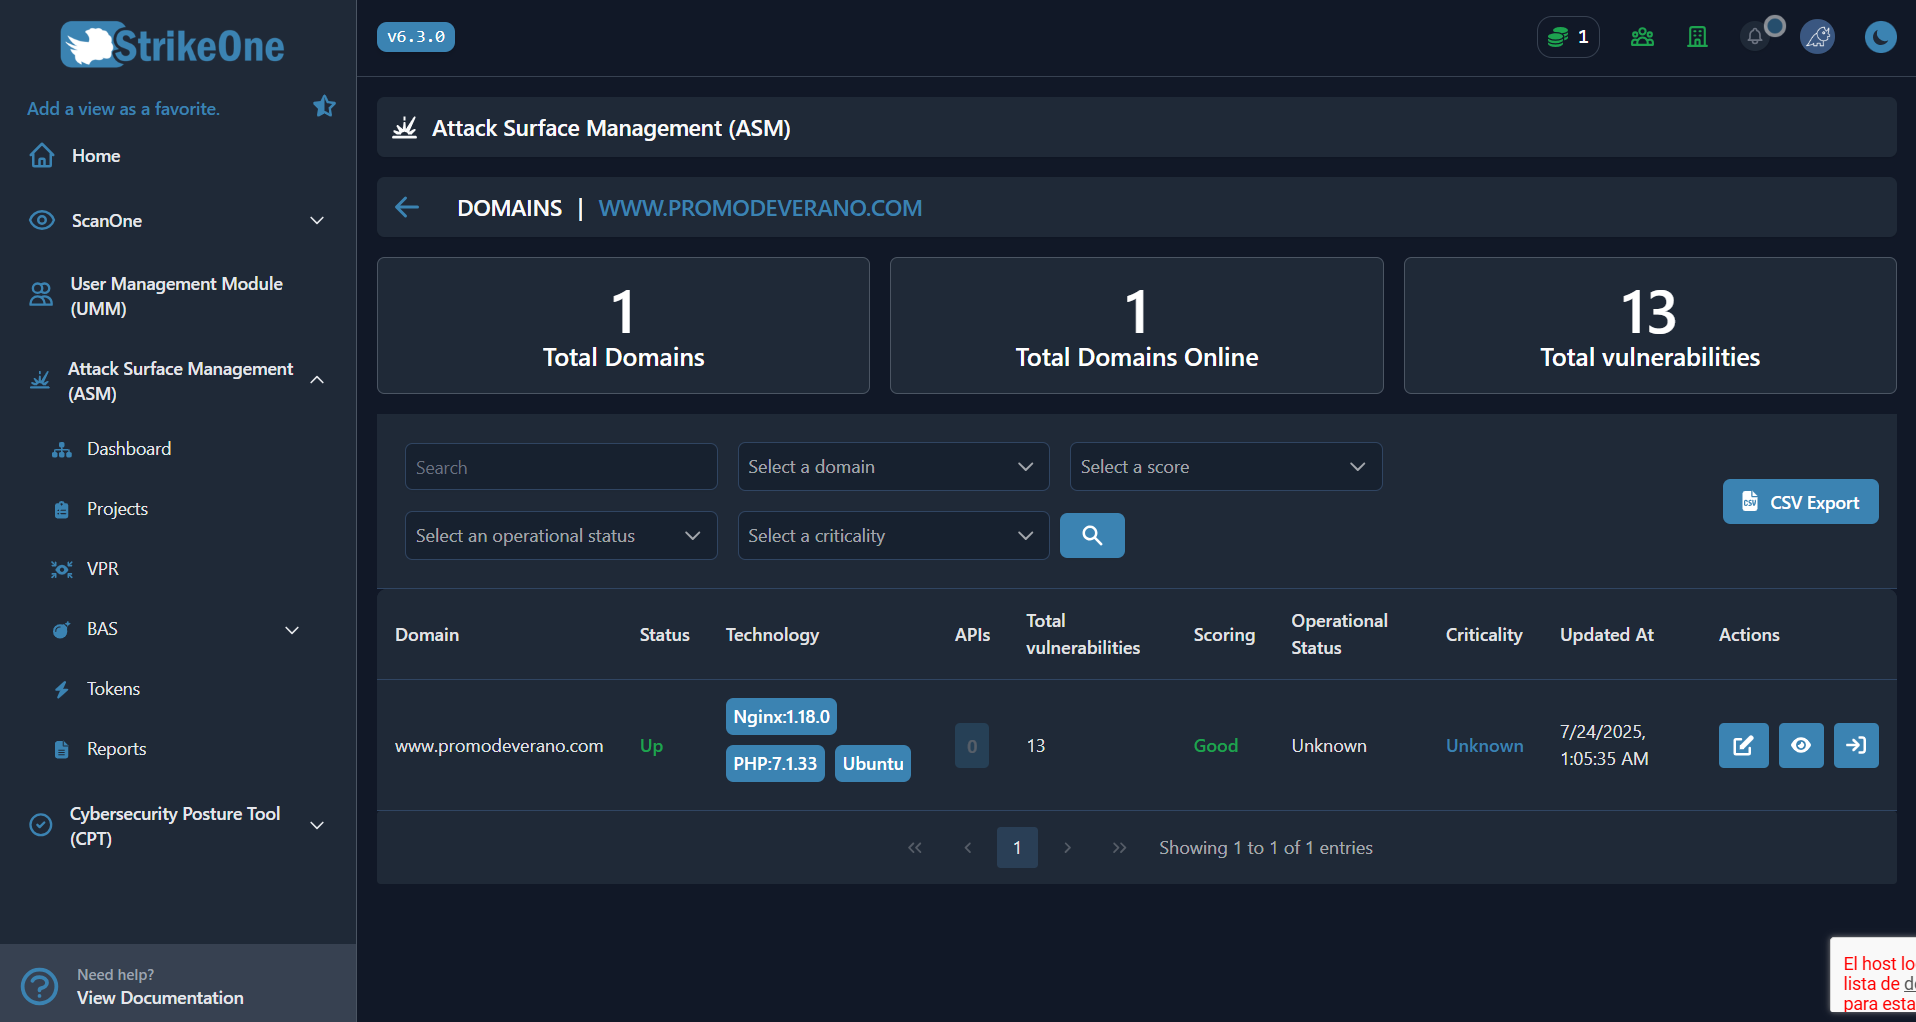
Domains: Domains are unique identifiers that represent addresses on the Internet. In attack surface management, domains can include website names, subdomains, and other online resources that can be potential targets for attacks.
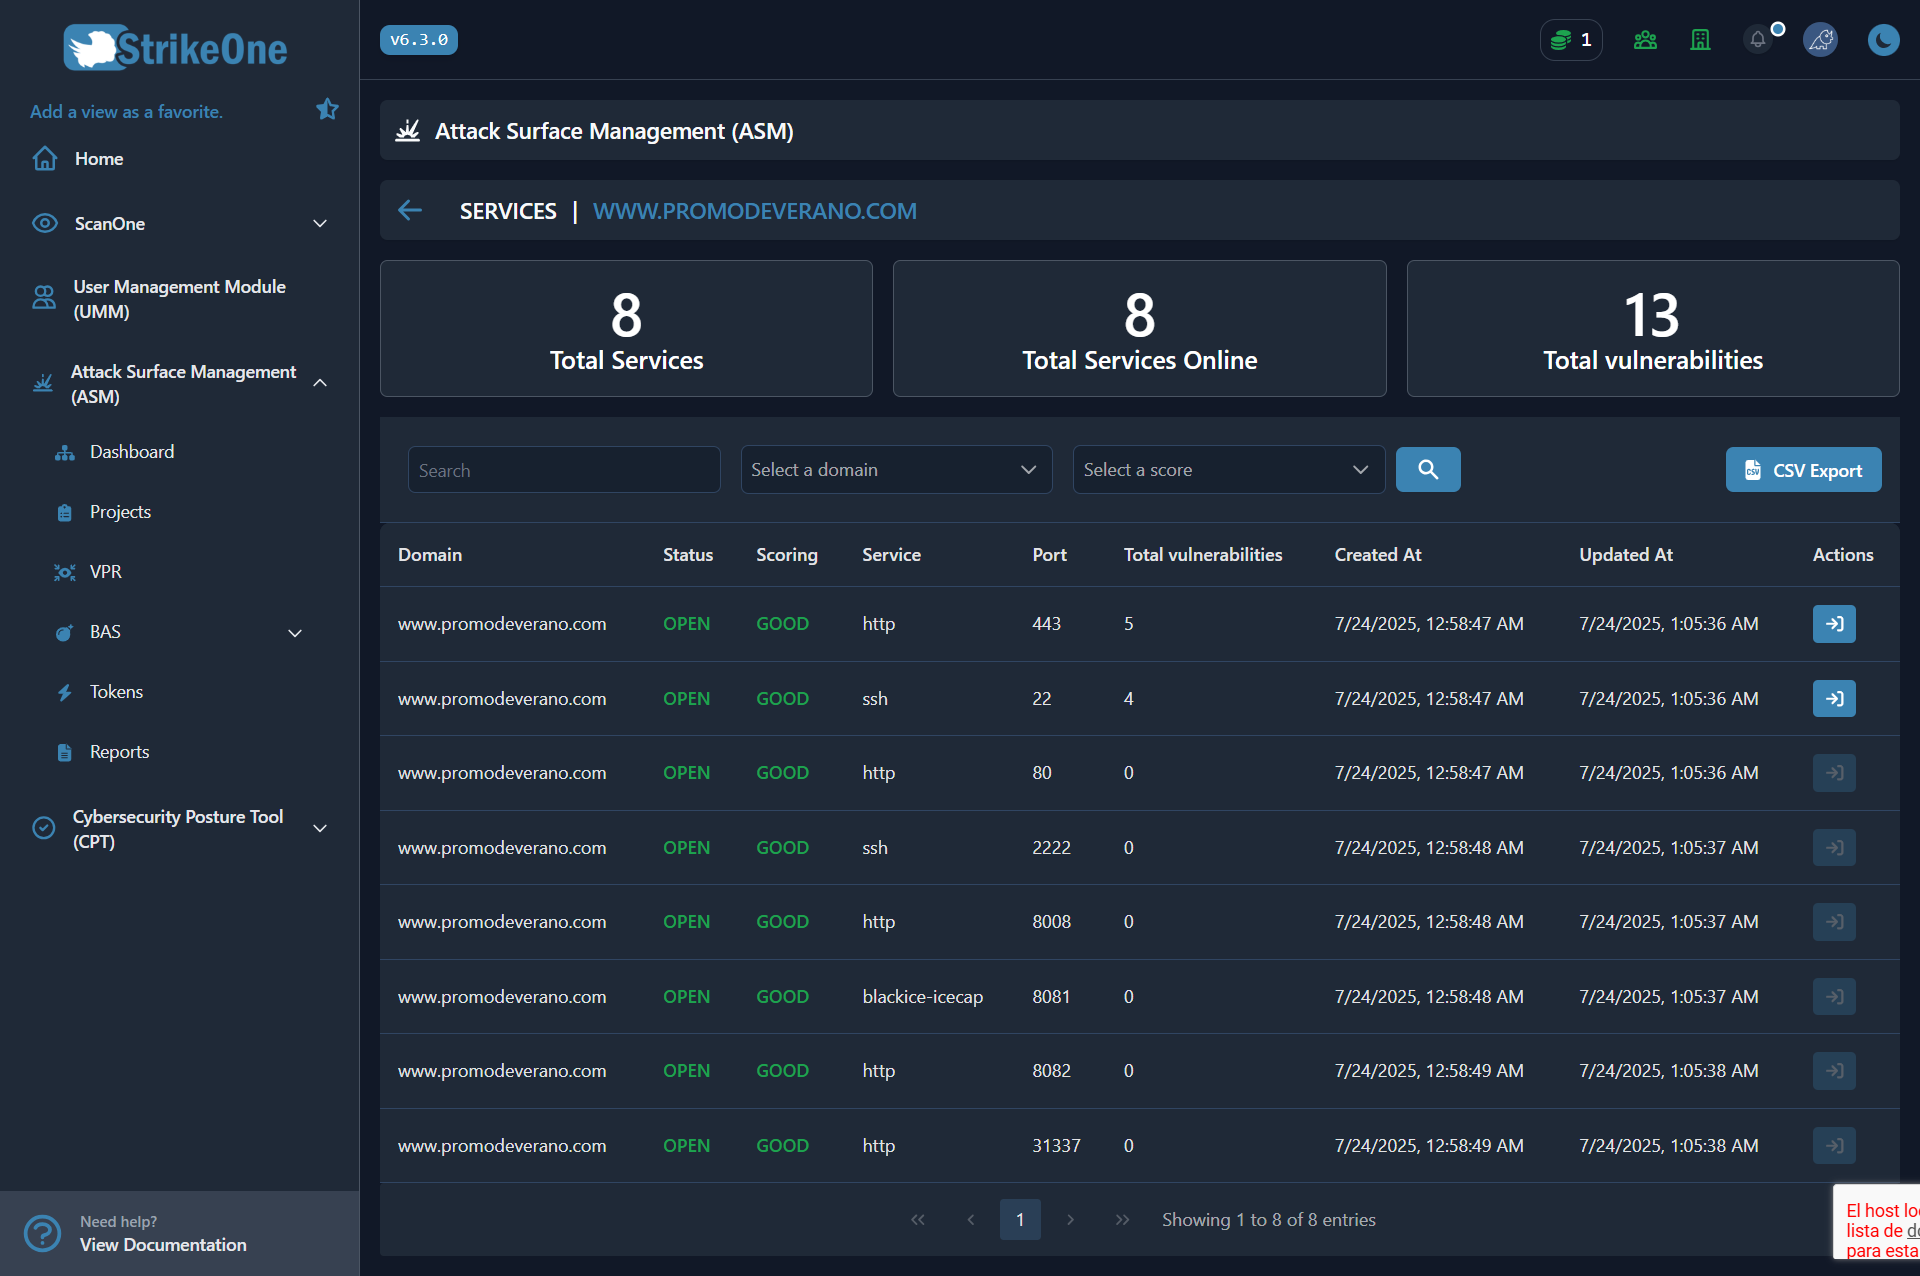
Services: Services are applications or processes that run on a host and can be accessible over the network. This could include web servers, databases, email servers, among others. Identify and manage these services is crucial to understanding potential vulnerabilities and exposures in your infrastructure.
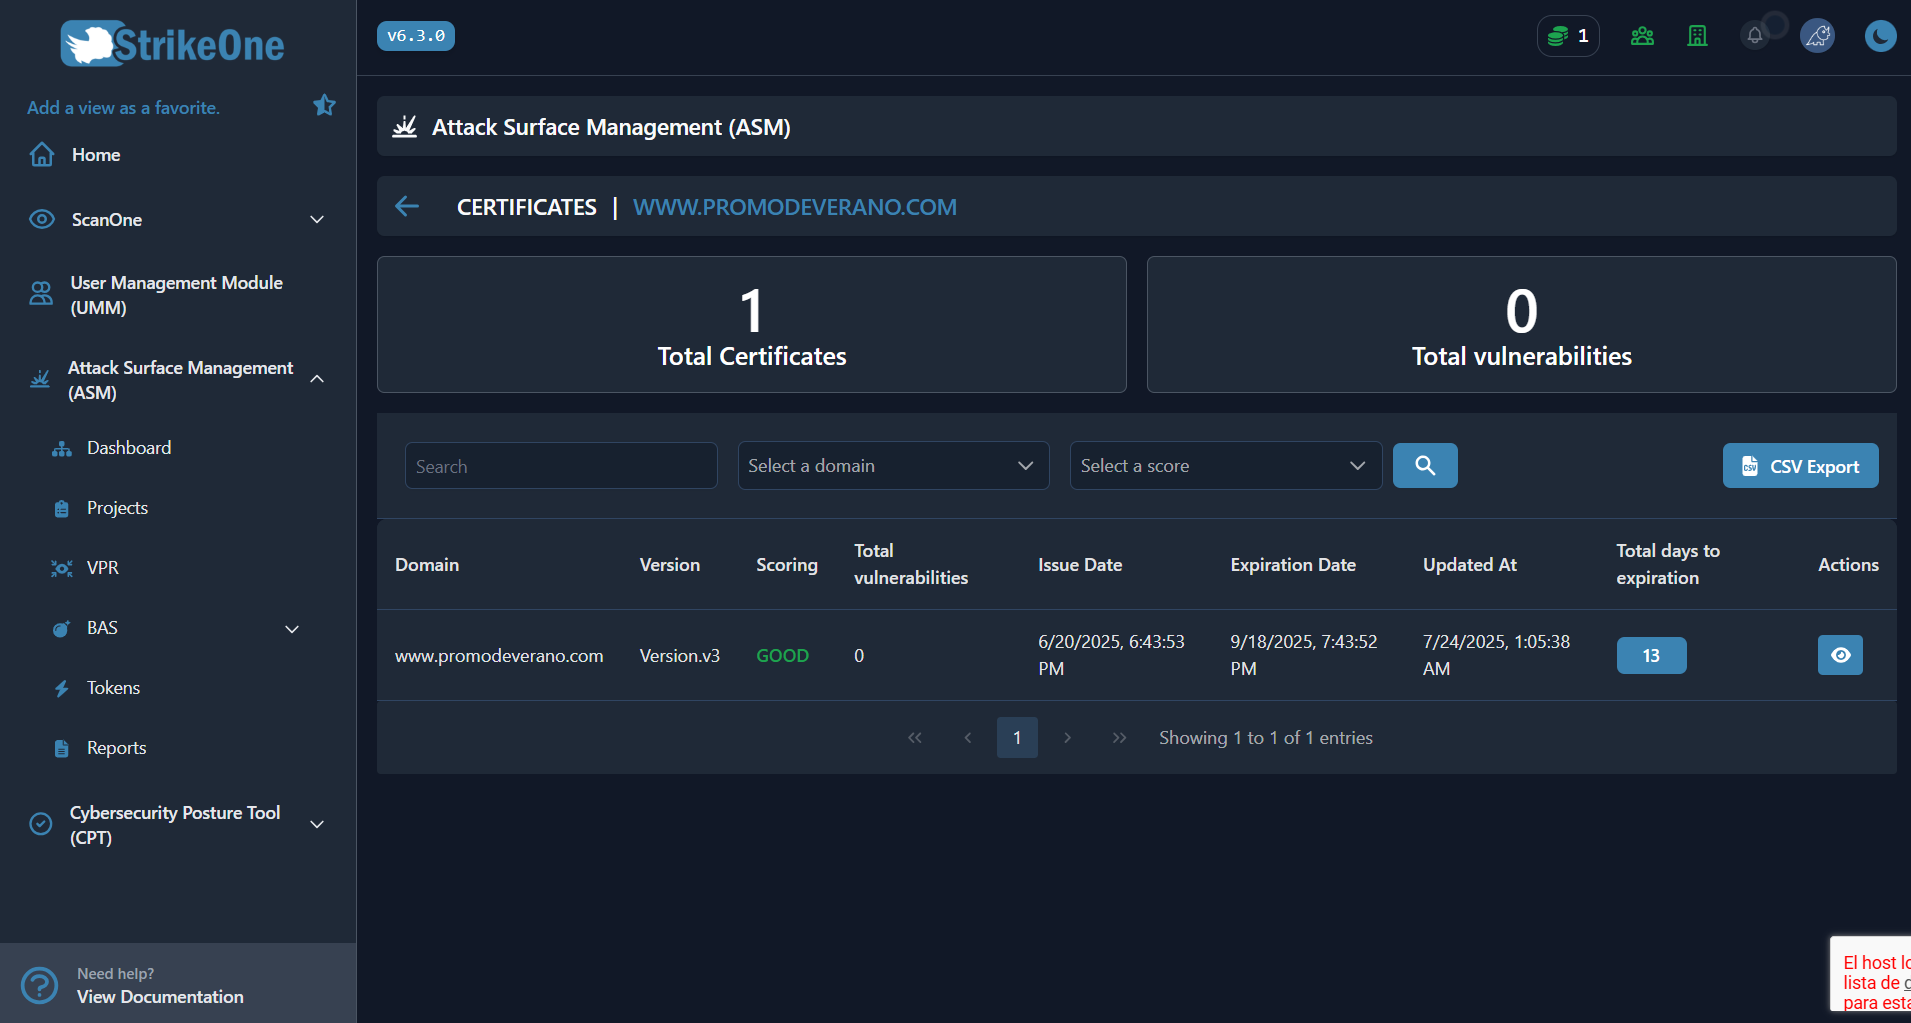
Certificates: Certificates are digital files used to establish the authenticity and security of online communications, especially over the HTTPS protocol. In the context of attack surface management, certificates can help identify secure websites and potentially detect fraudulent or compromised sites.
Filtrations: Breaks refer to the unauthorized exposure of sensitive or confidential data. In attack surface management, monitoring breaches allows you to identify and mitigate security gaps that could expose your organization's valuable information.

Vulnerabilities: Vulnerabilities are weaknesses or flaws in a system that attackers can exploit; identifying and remediating them is essential in Attack Surface Management (ASM) to reduce the risk of a cyberattack. This tab allows you to view detailed information for each vulnerability found, showing key data such as its severity level (e.g., Informational, Low, Critical) and the affected port. Additionally, it provides a button to access an AI-generated analysis and a "View More" button that displays crucial information, such as the recommended remediation steps and the potential impact of the flaw.

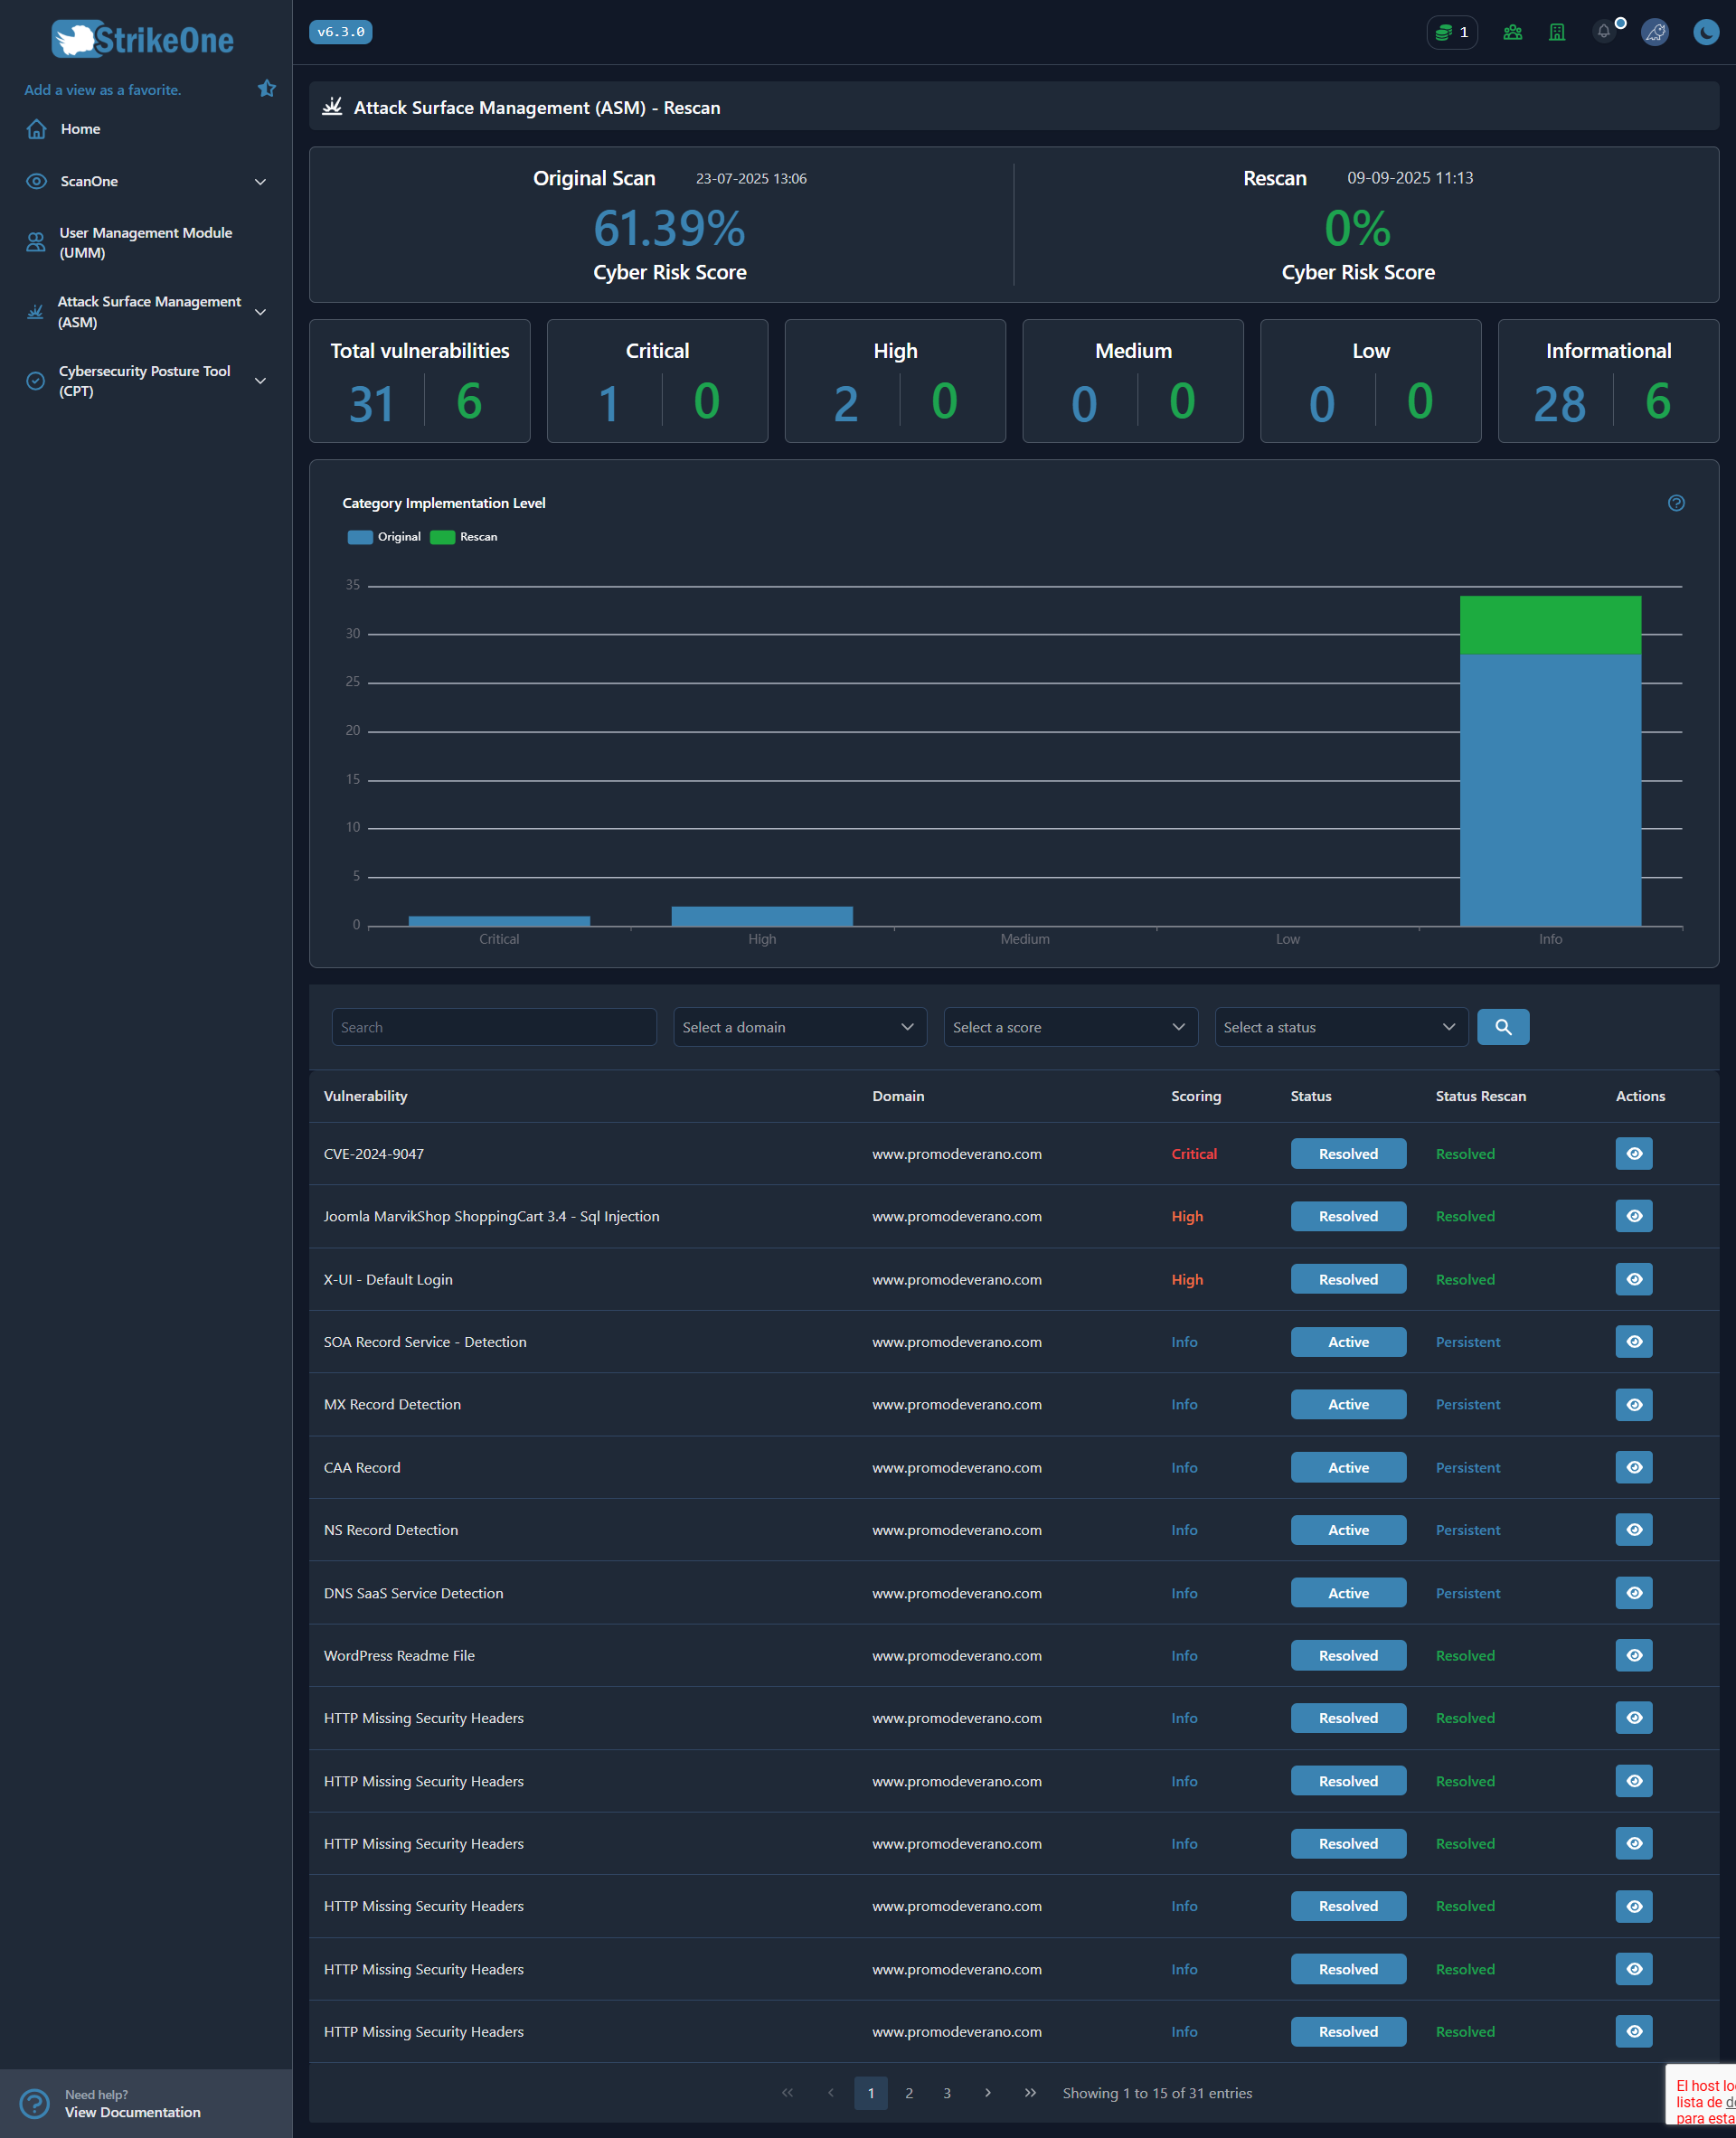
Rescan
The Rescan view automatically compares the results of the original scan with the selected rescan. Its purpose is to allow the user to immediately see:
How the cyber risk score has changed.
How many vulnerabilities (by severity) have been resolved or are still present.
A detailed breakdown of each vulnerability and its current status.
With this information, you can quickly verify whether your fixes or mitigations are effective and prioritize remediation actions.
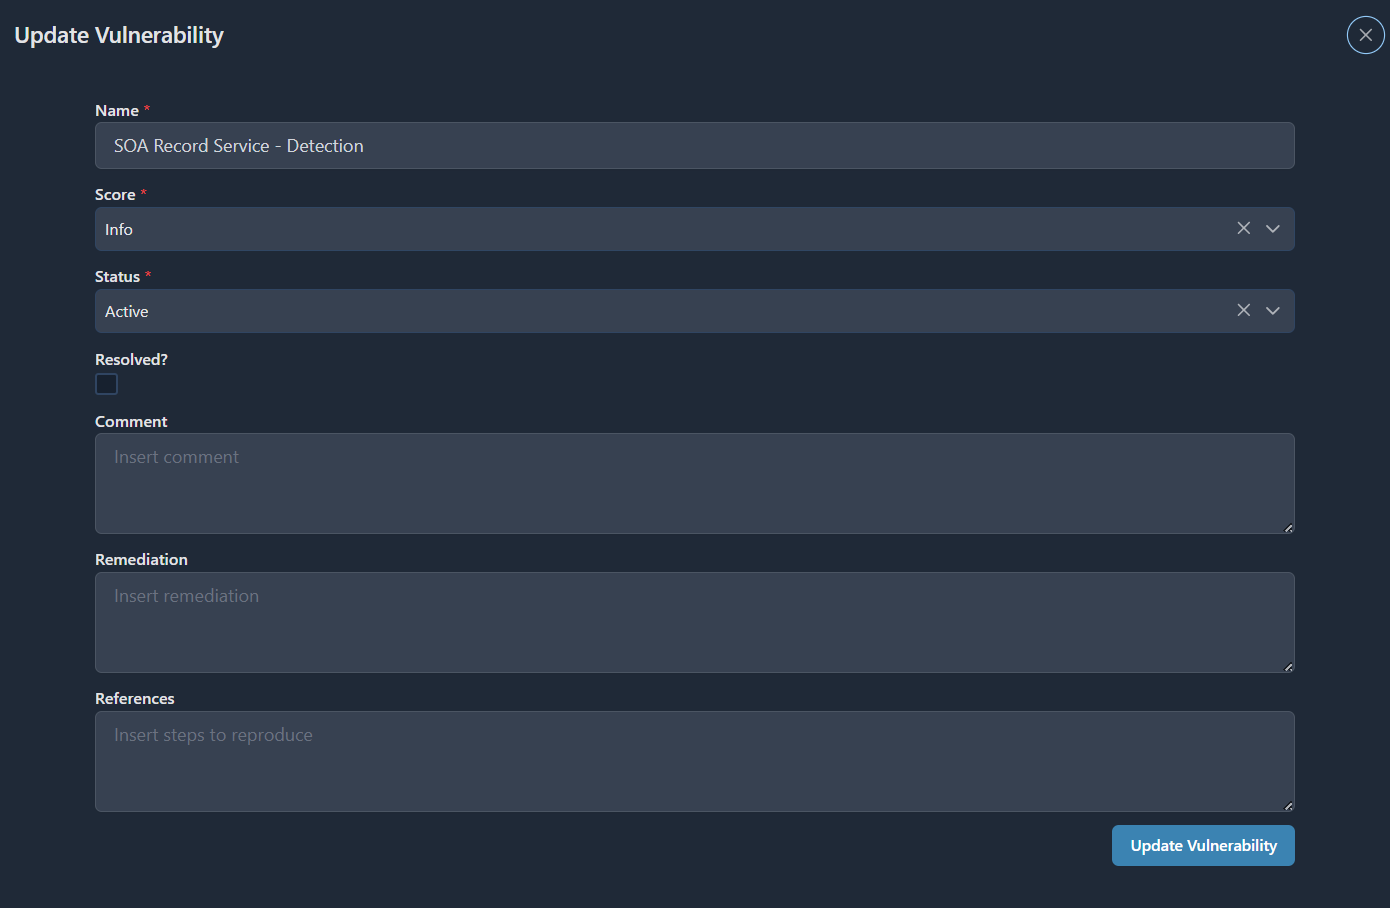
Vulnerability Management
You can manage vulnerabilities and enrich them, to have better detail.
VPR
VPR is a vulnerability priority rating that is based on the severity of the vulnerability and the likelihood that it will be exploited.
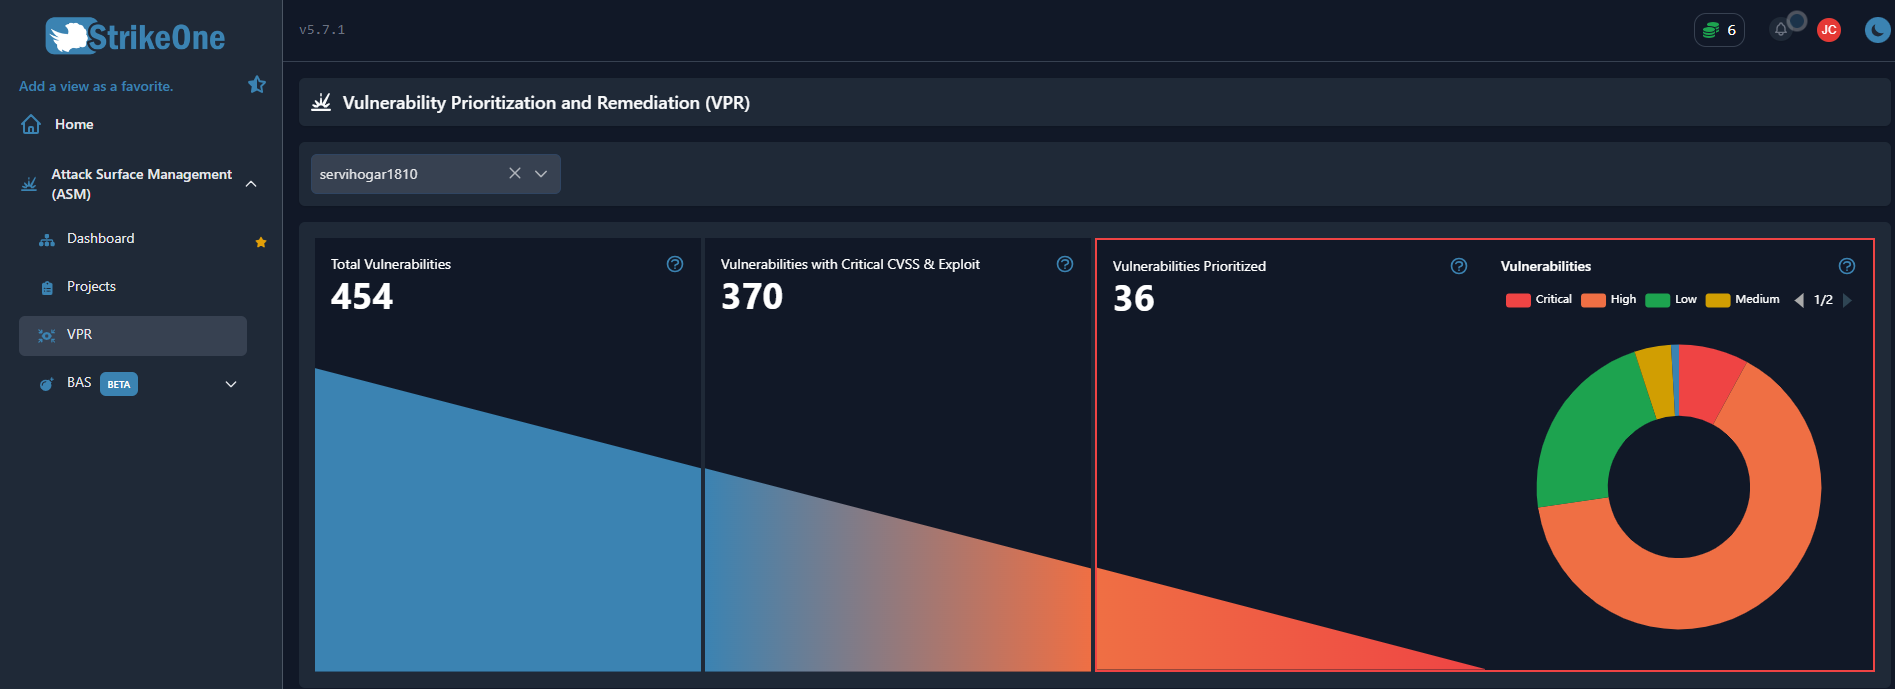
- Total Vulnerabilities: This chart shows the total number of vulnerabilities identified in the system. It is a key metric for understanding the overall scope of potential security threats faced by the project.
- Vulnerabilities with Critical CVSS & Exploit: This chart indicates the number of vulnerabilities with a Critical or High CVSS (Common Vulnerability Scoring System) score that also have a known exploit.
- Vulnerabilities Prioritized: This chart shows the number of vulnerabilities that have been prioritized for remediation. The prioritization is based on various factors, including the criticality of the vulnerability, the size of the company, and the criticality of the domain.
- Vulnerabilities: This graph provides an overview of the distribution of vulnerabilities according to their risk level.
BAS
You can simulate and validate if any of your assets are potentially affected by new vulnerabilities.
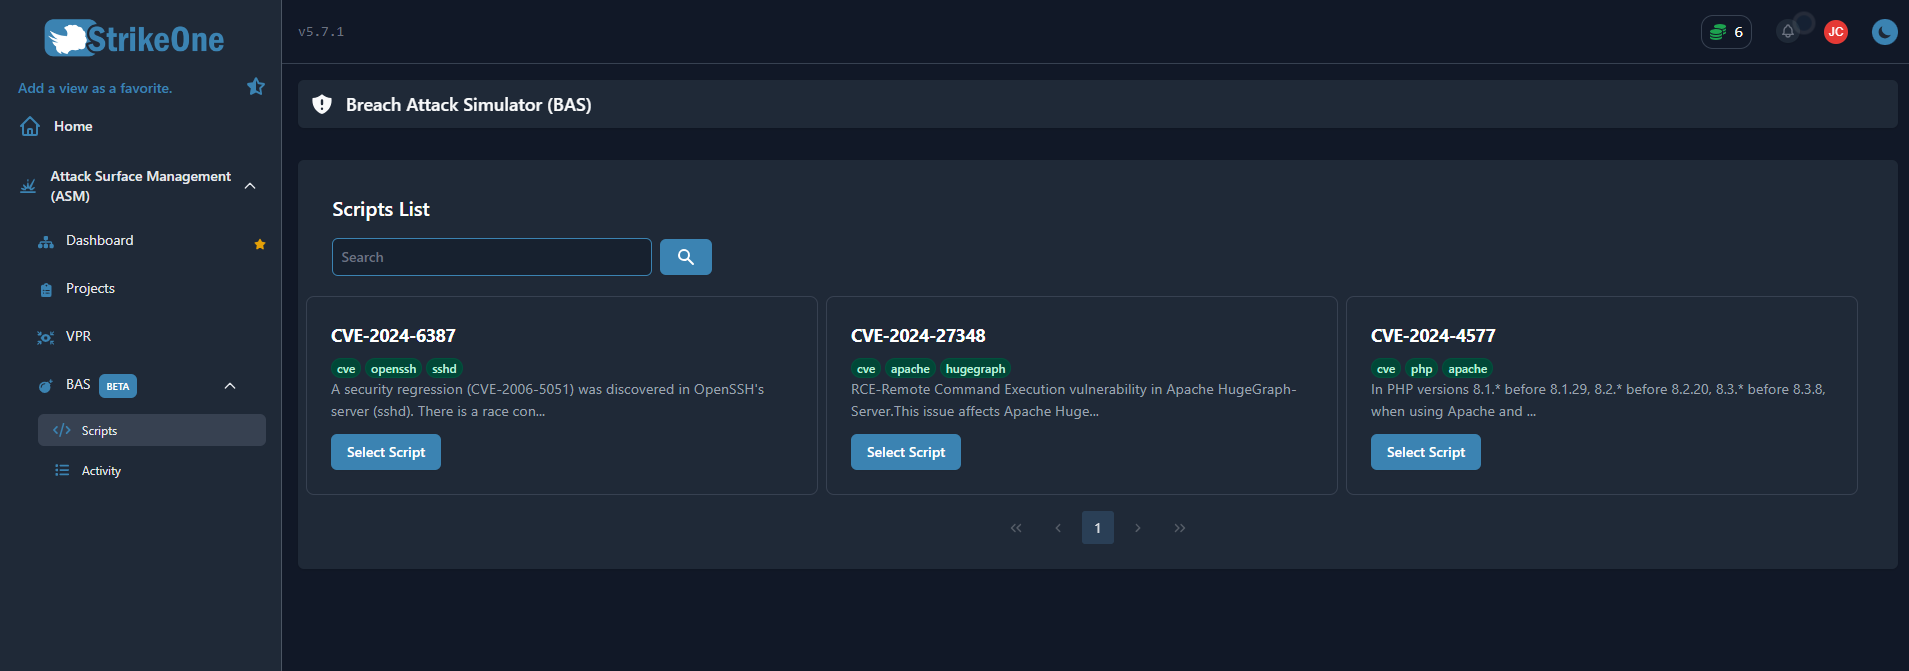
Running a script
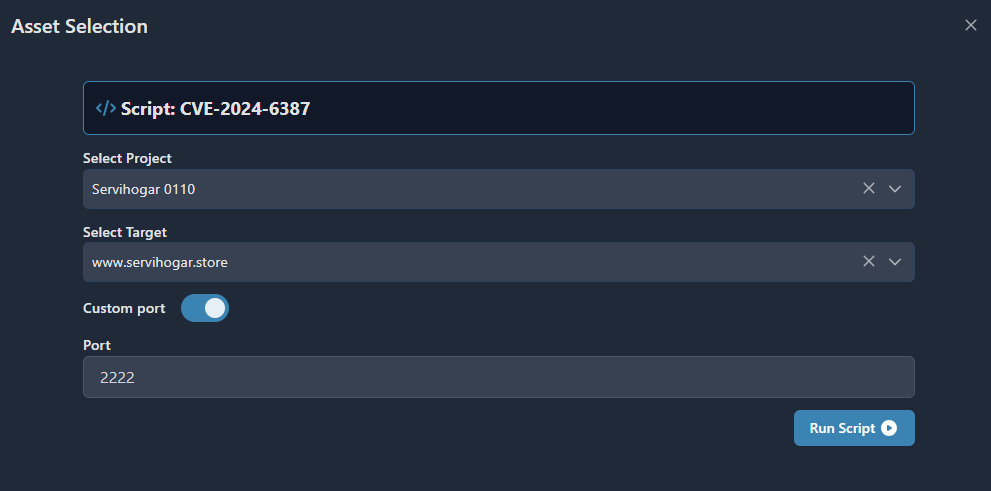
- Select a Script
- Select a Project
- Select a Target
- You can customize the port
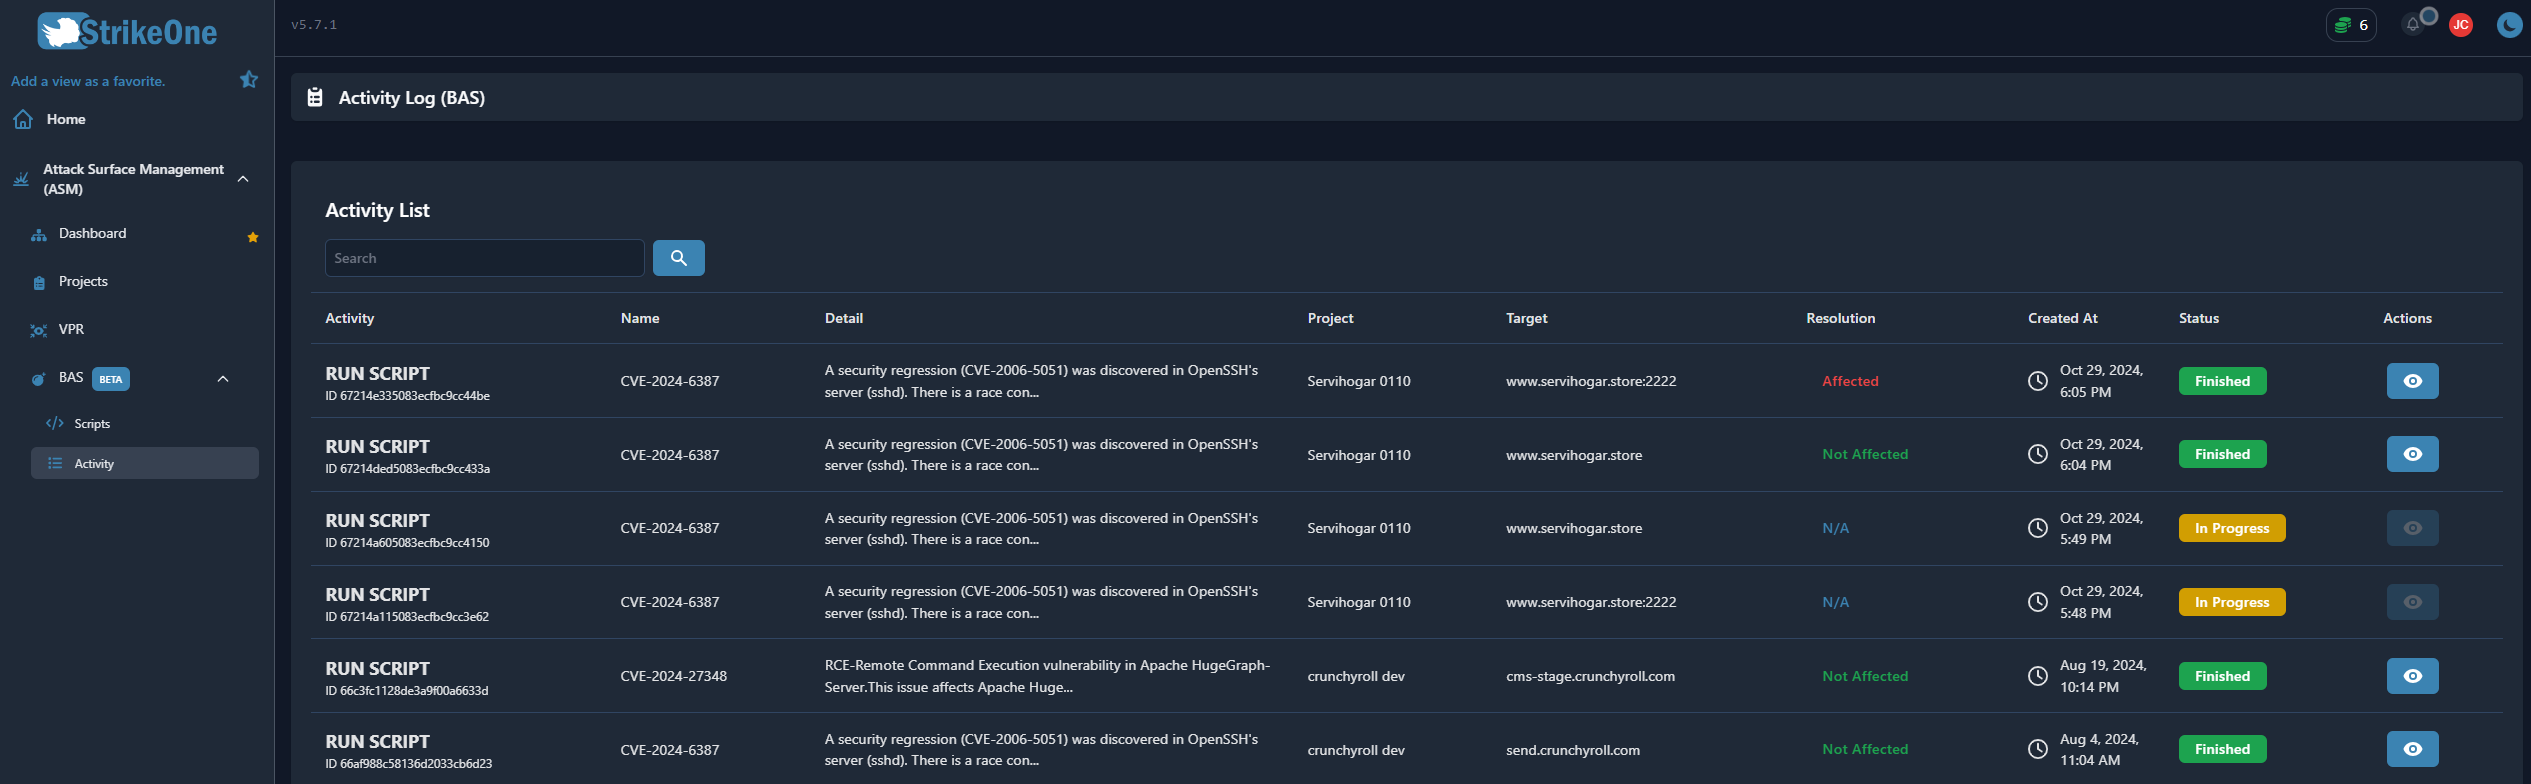
- Run Script
- Get the results
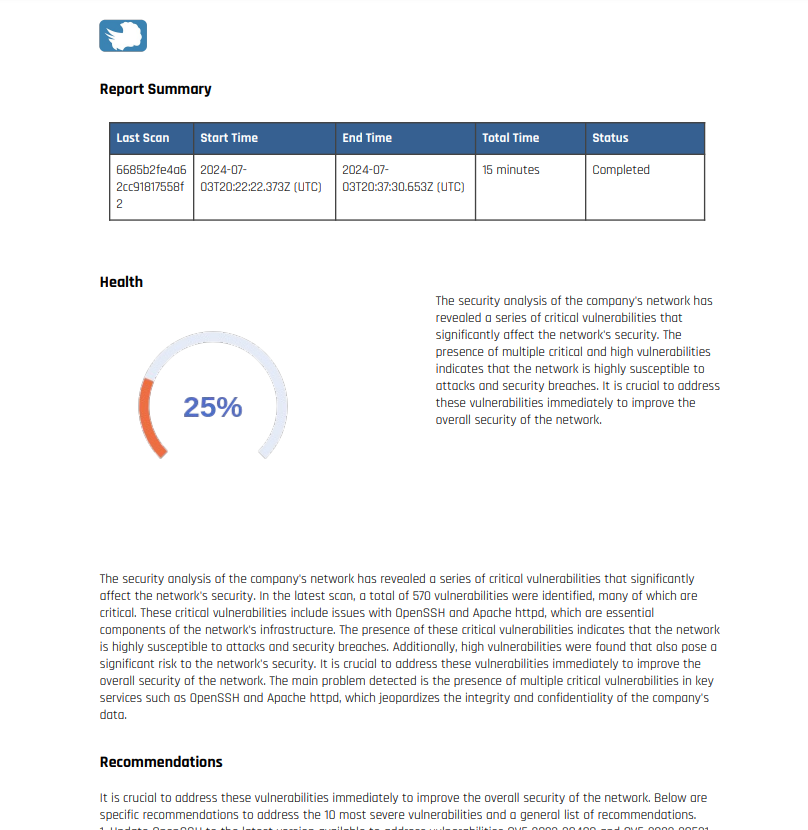
Reporting
You can create a report based on the latest analysis of the project. It can be generated in Spanish or English.
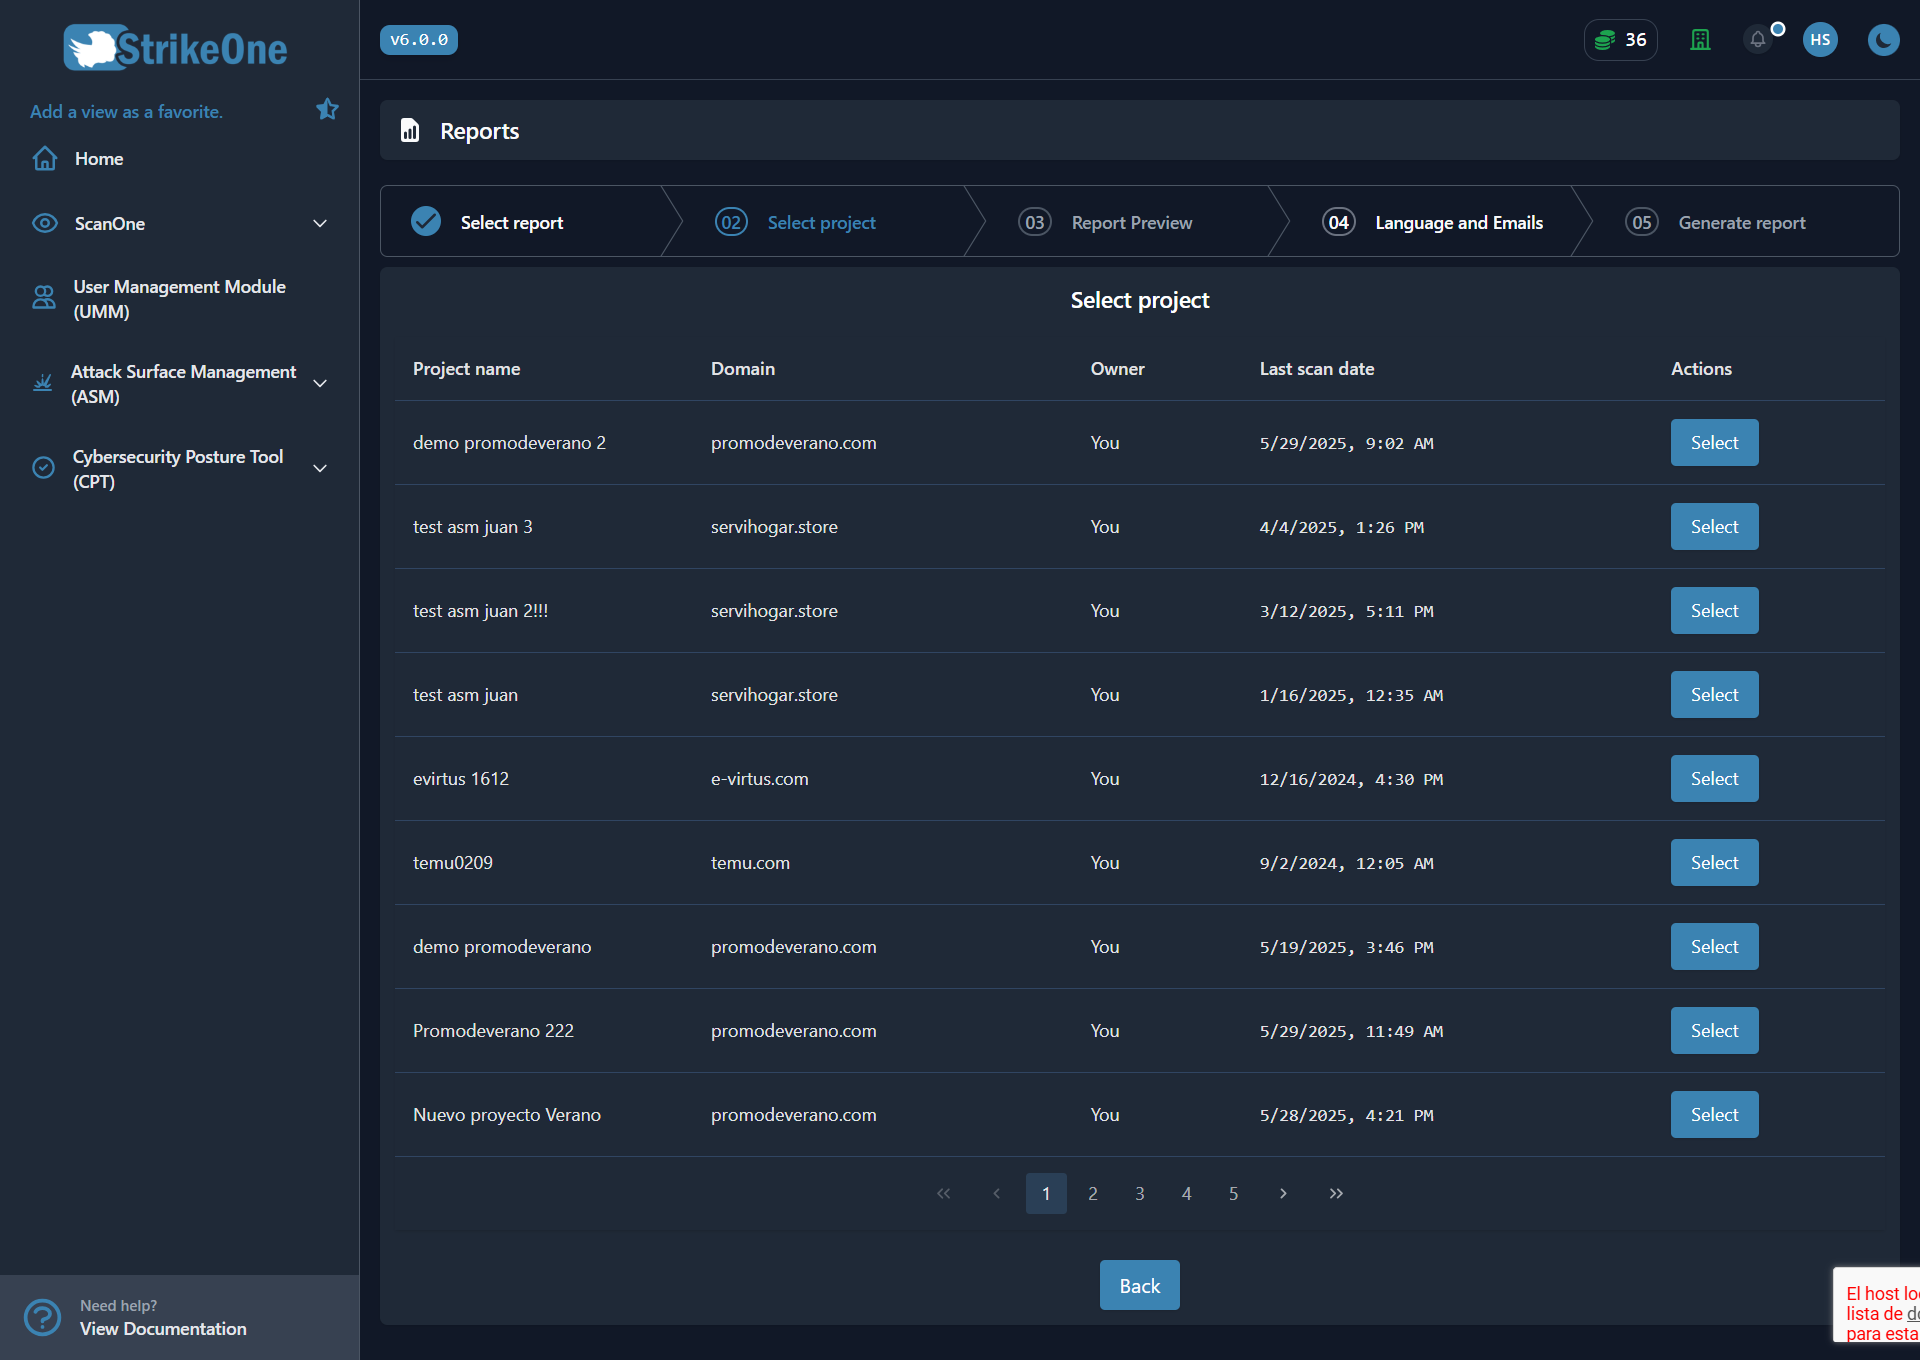
In this reports section, you can select the type of report you wish to generate, choosing between a general report or a re-scan report.

Once the report type is selected, a table with the created projects will be displayed, allowing you to choose the project for which you want to generate the report.
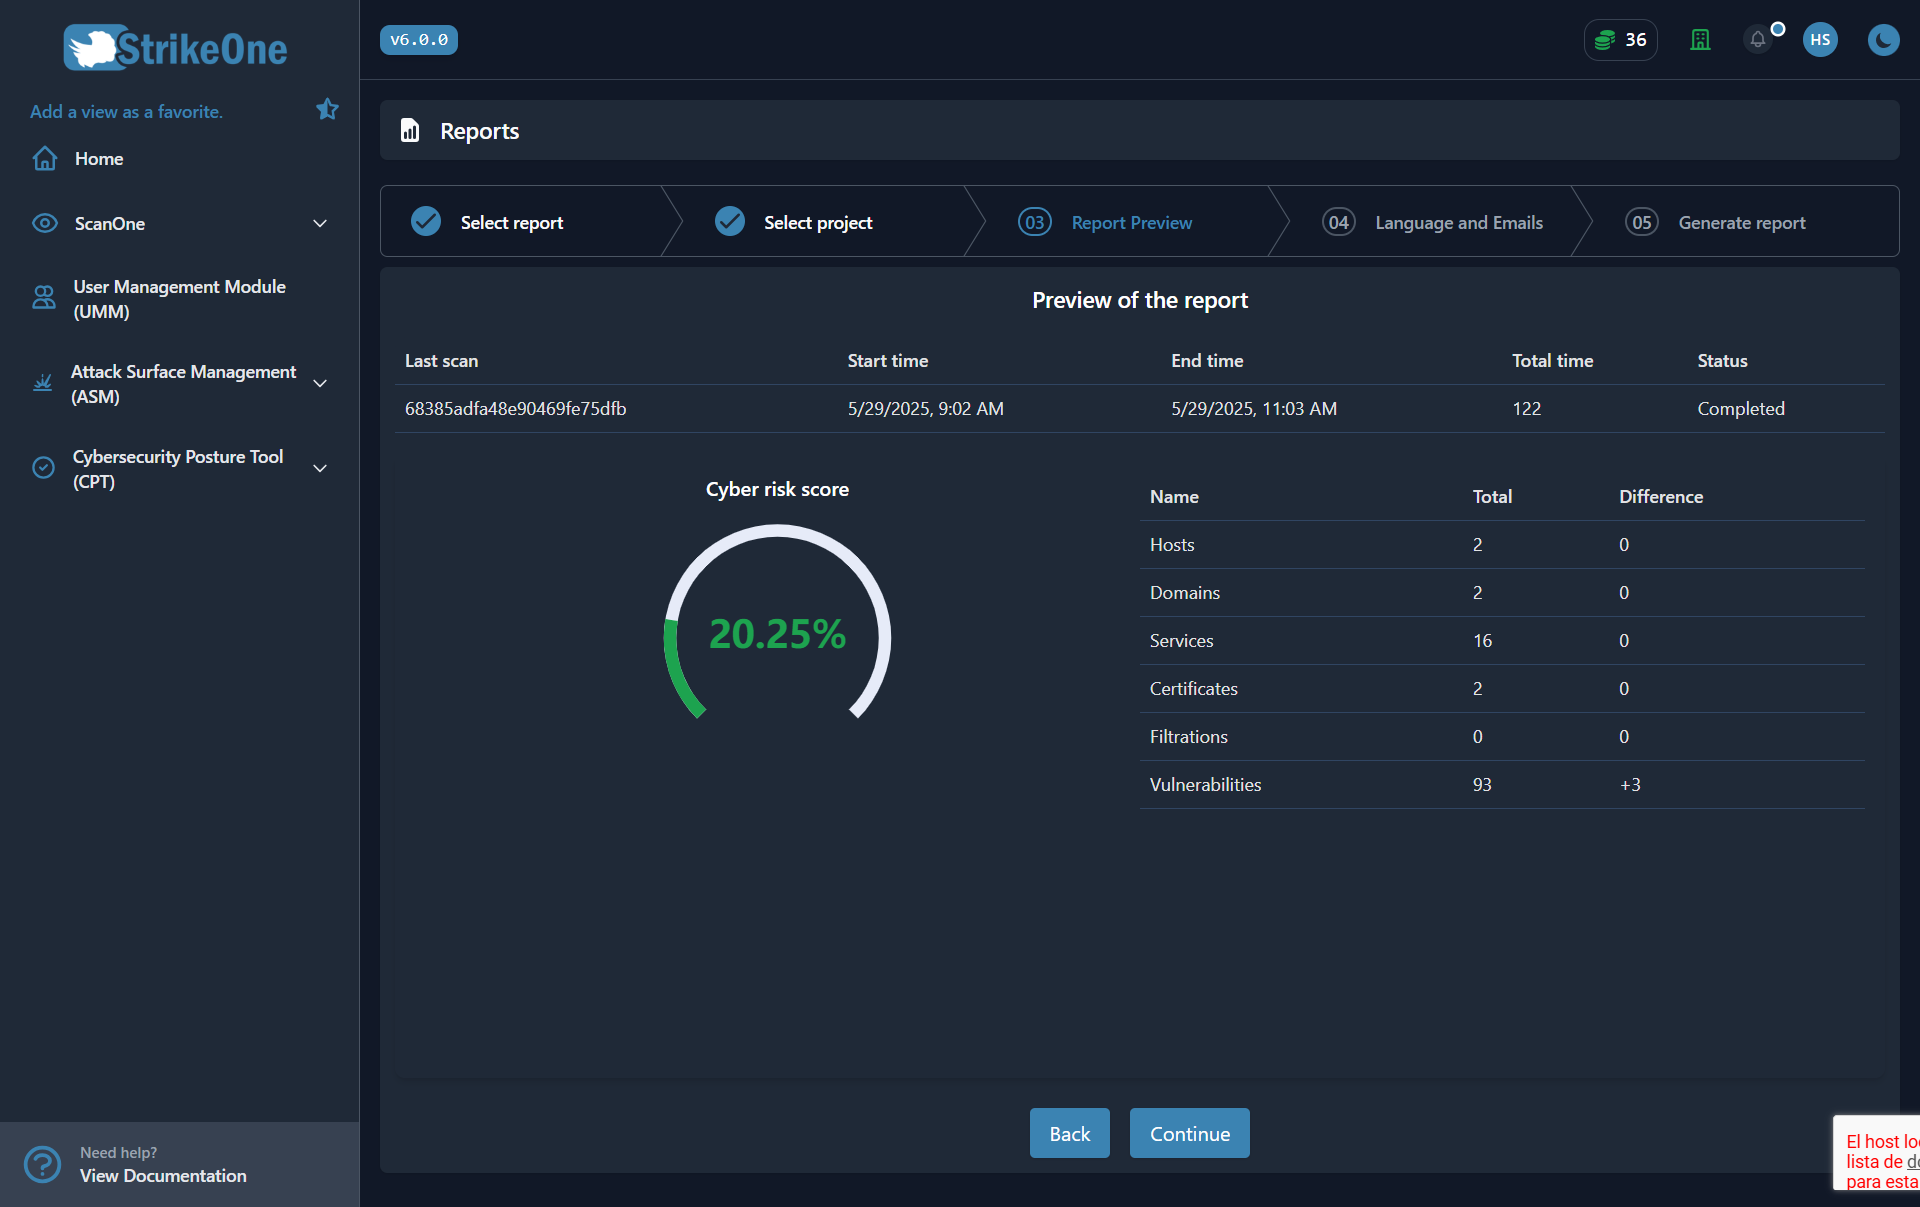
After selecting a project, the most relevant data of the report will be displayed.
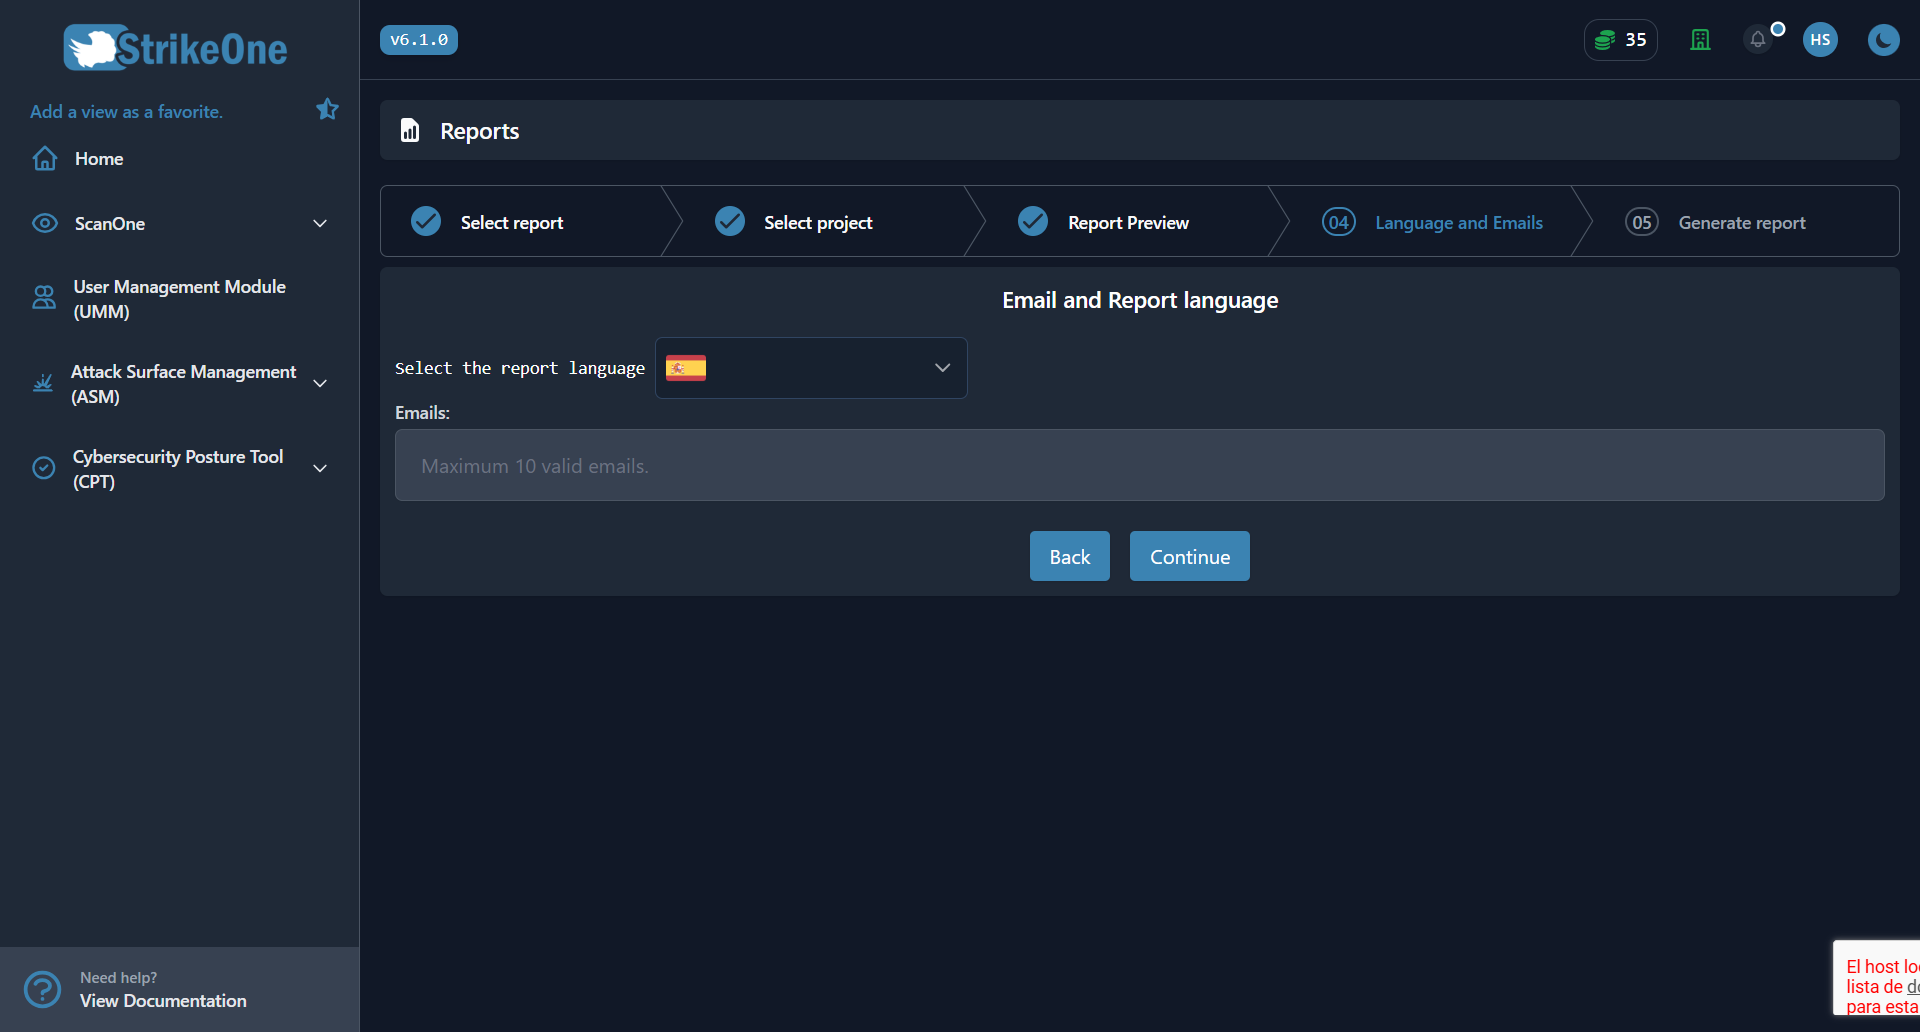
Once the data is confirmed and the option to proceed is enabled, you will be able to select the language in which you want to download the report. Additionally, you can enter email addresses (optional) in case you wish to send the reports via email.
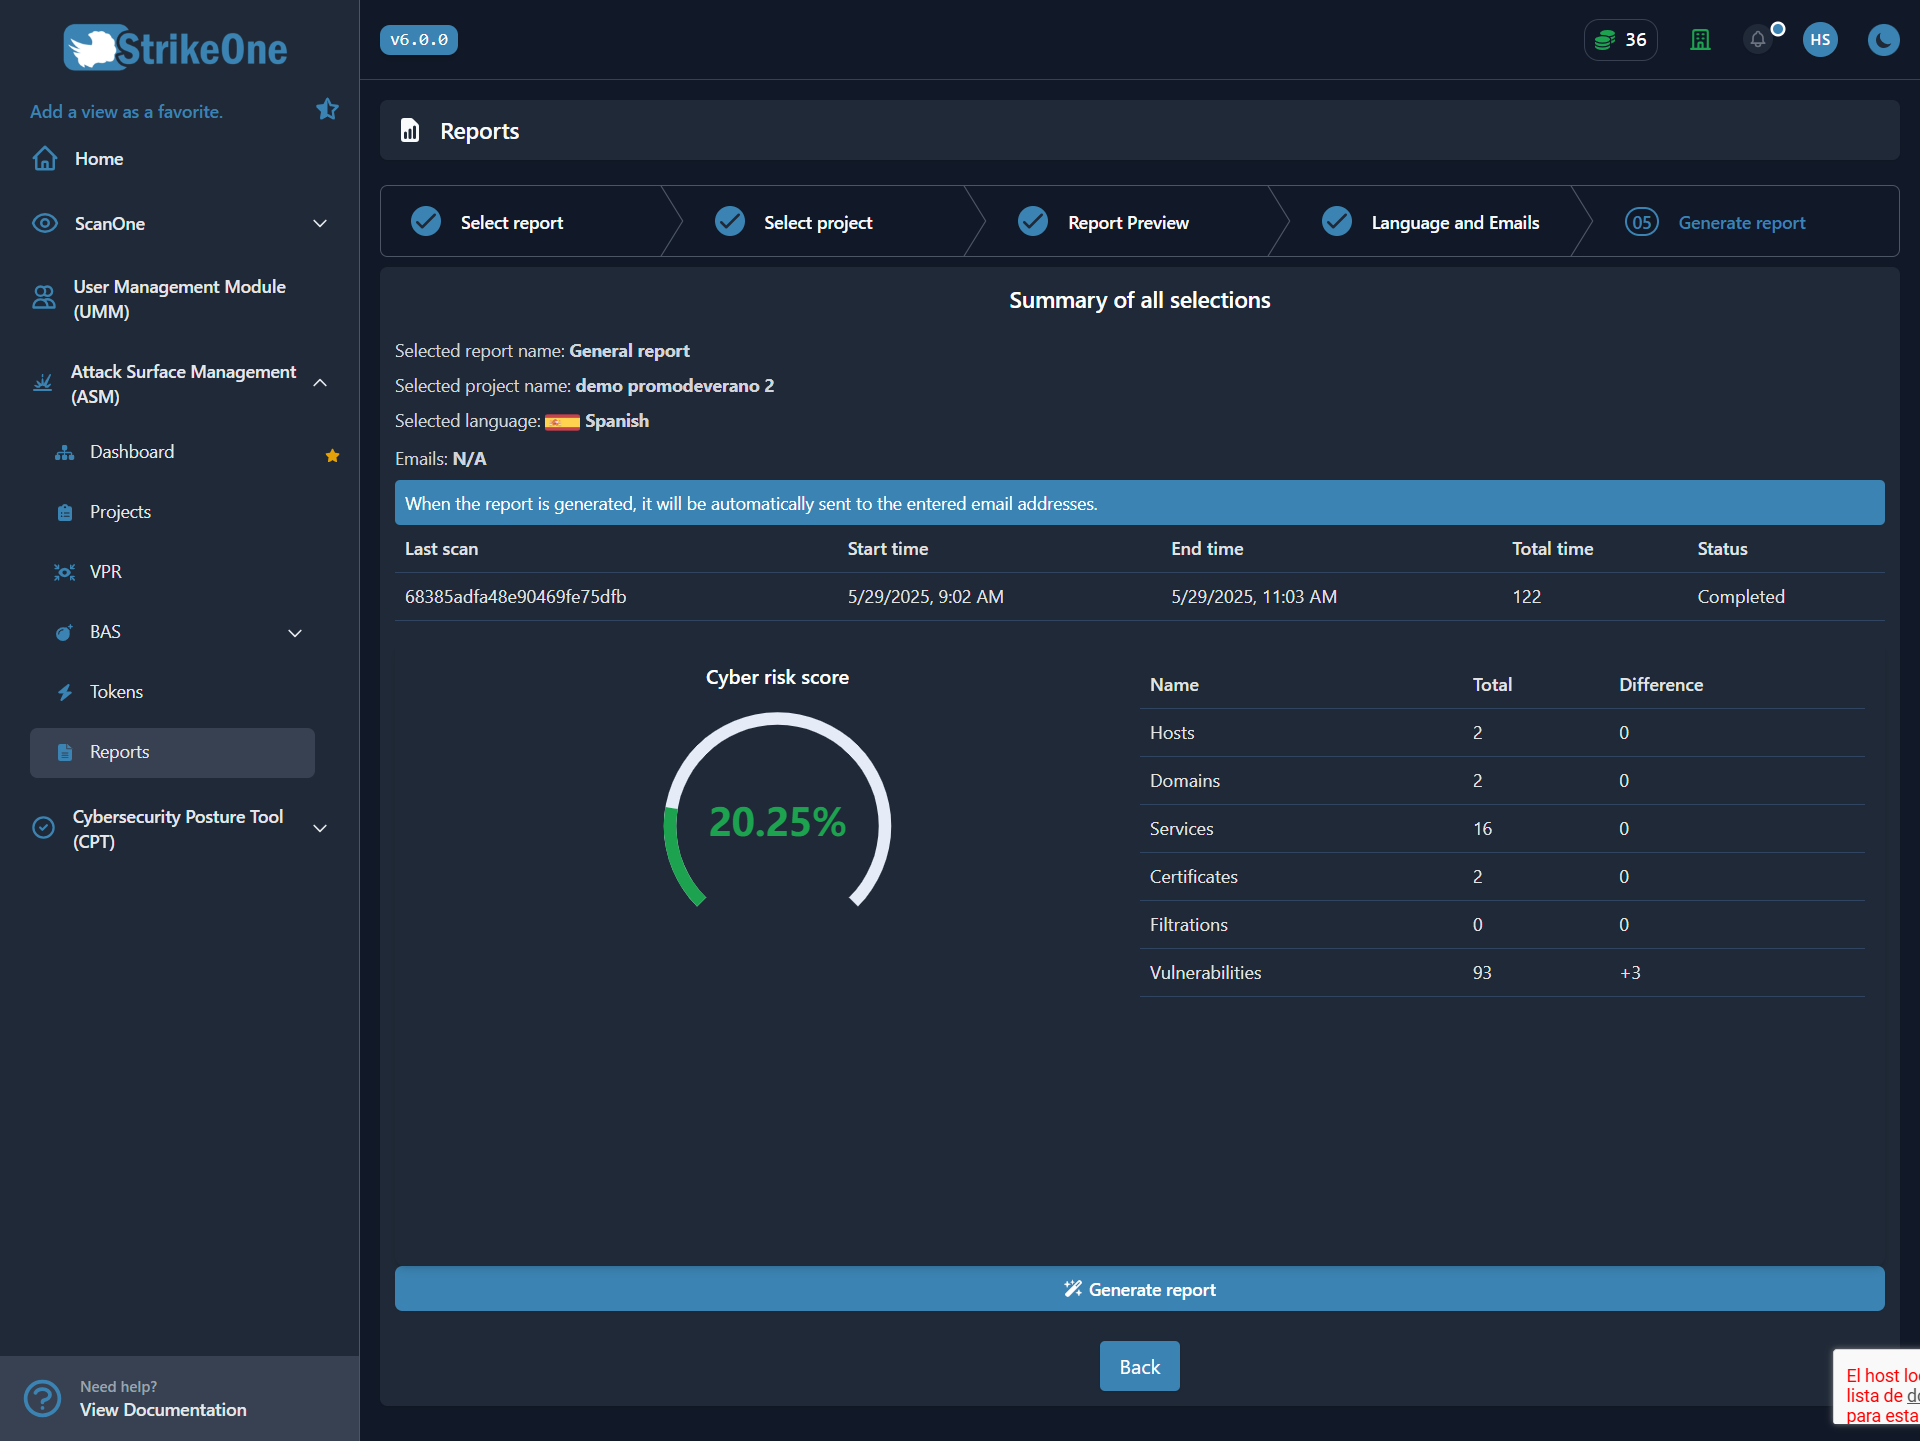
In the final step, a summary of all the previously selected information will be displayed. Additionally, there will be a button to start the report generation, and if email addresses were entered, the report will also be sent via email. Once generated, the button will change to 'Download report', which will be available for one minute before it expires.
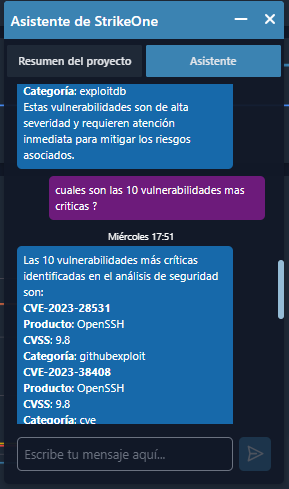
AI Assistant
The assistant can help you understand your current situation on the internet, at any time:
- Provides cybersecurity recommendations.
- Provide your general status of the project.
- Provides vulnerability mitigations.